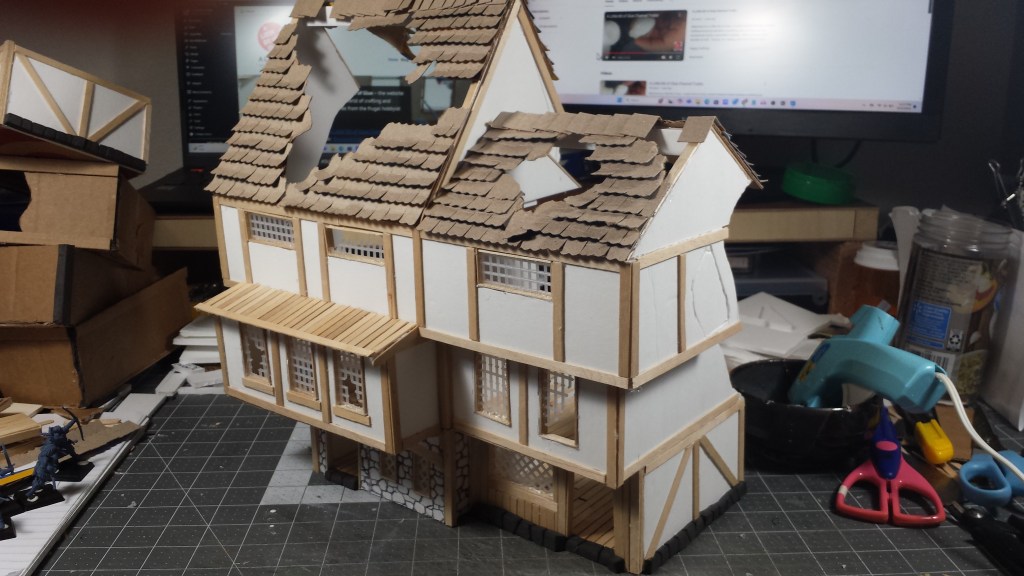
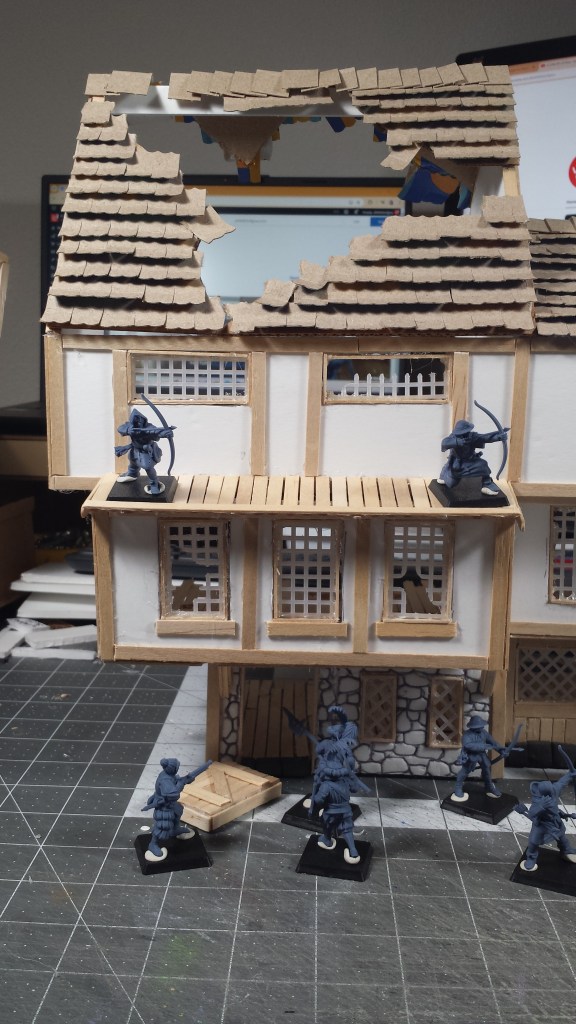
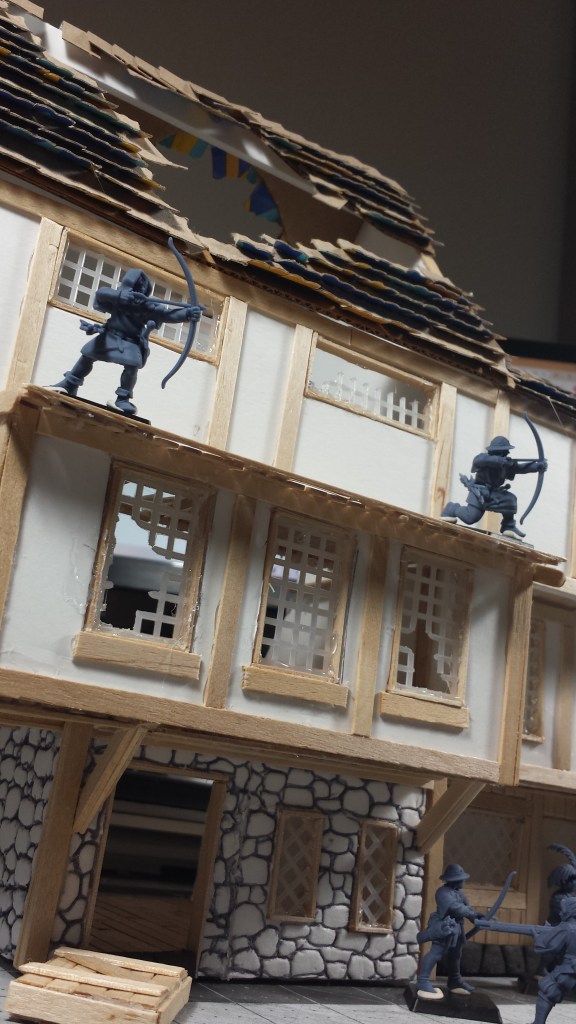
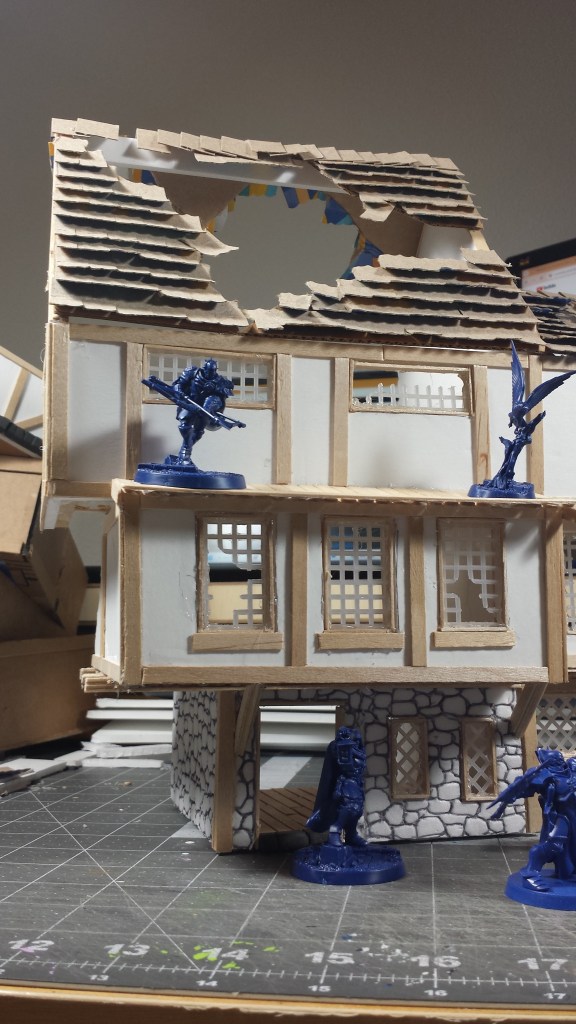
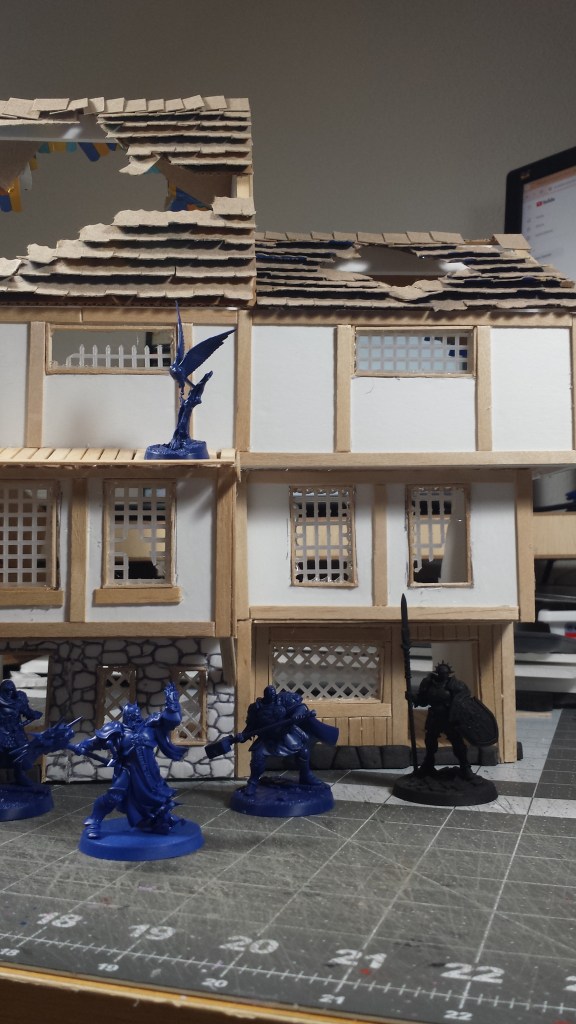
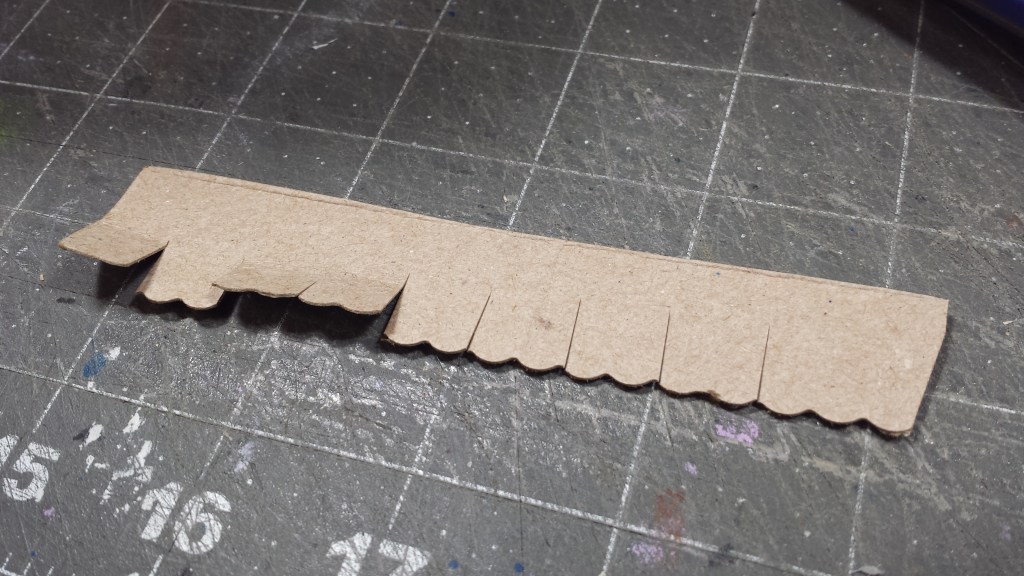
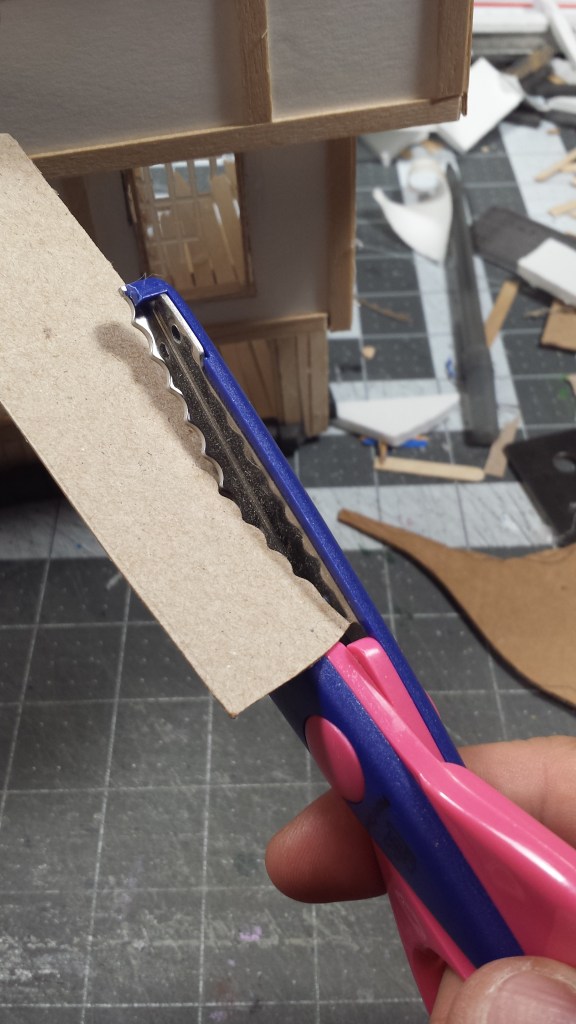
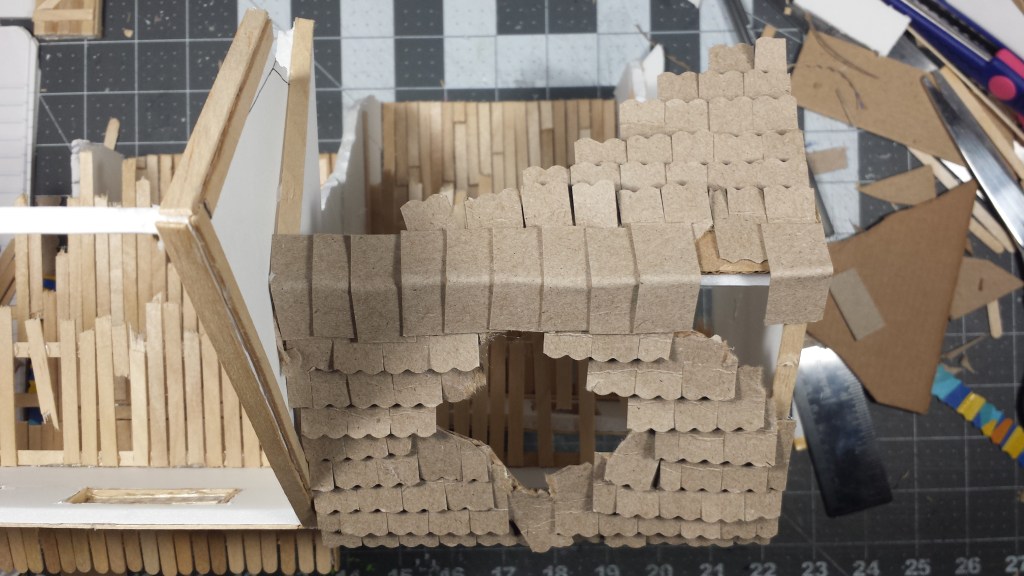
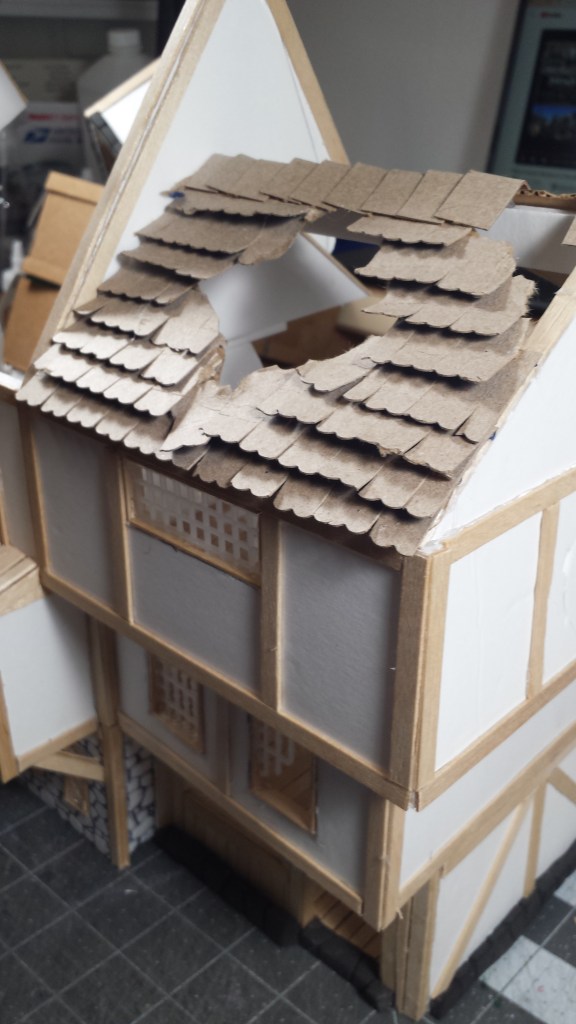
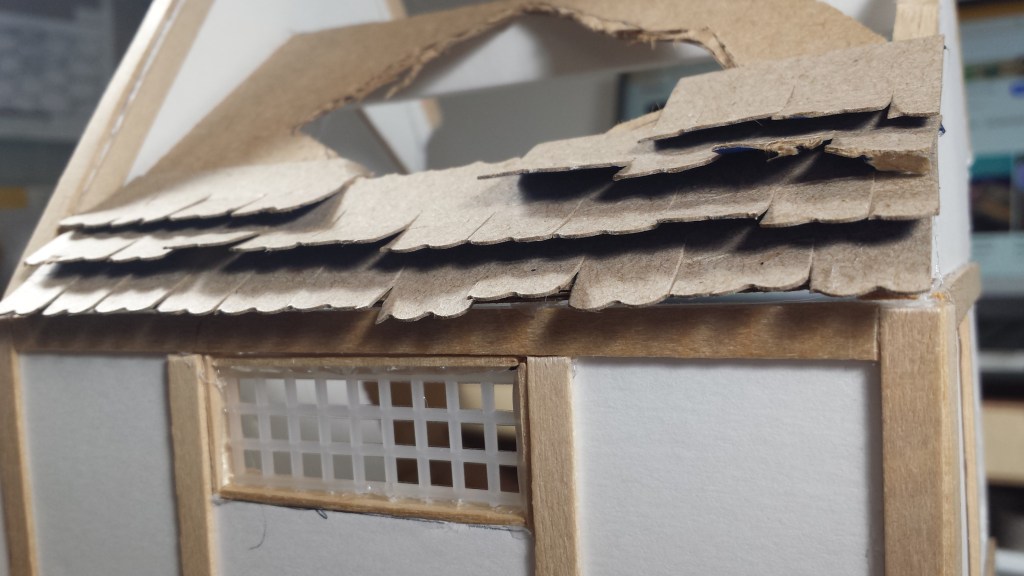
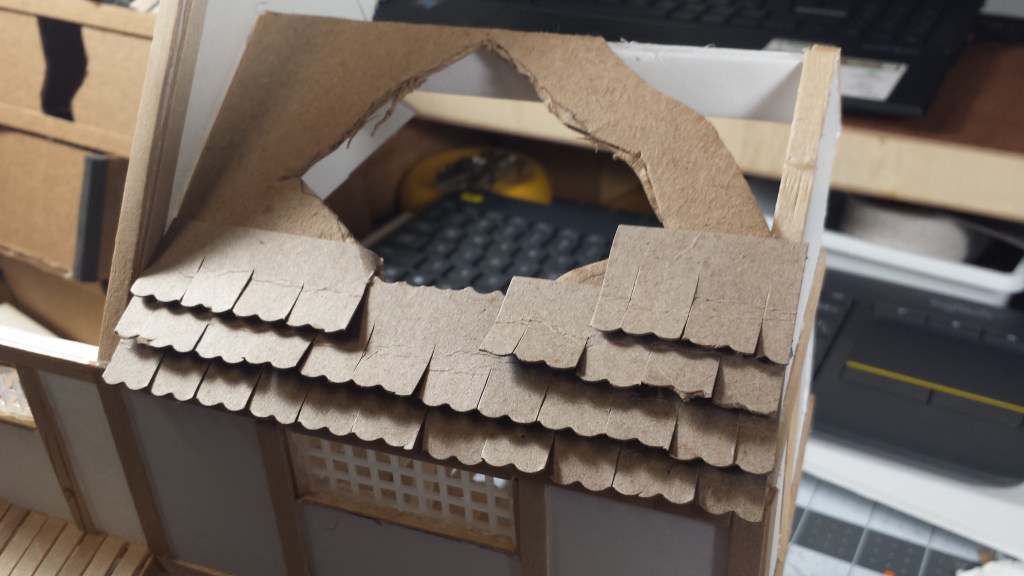
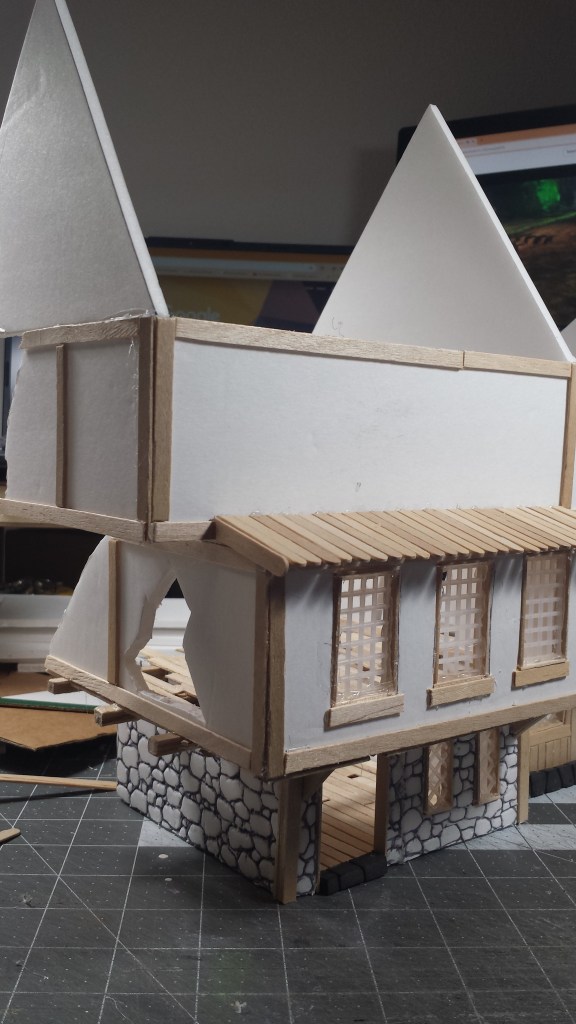
Hi. It is technically still Sunday as I begin writing this post. I worked on completing the roof shingling this night. I cut strips of thin cardboard using the pinking shears to get that shingle edge look. I then cut slits into the strips to give the appearance of single shingles. I then embarked on the task of hot gluing the shingles to the roof in appropriate areas, but not before I gave each strip a bit of a curl because medieval/olde world materials tend to do that sort of thing.
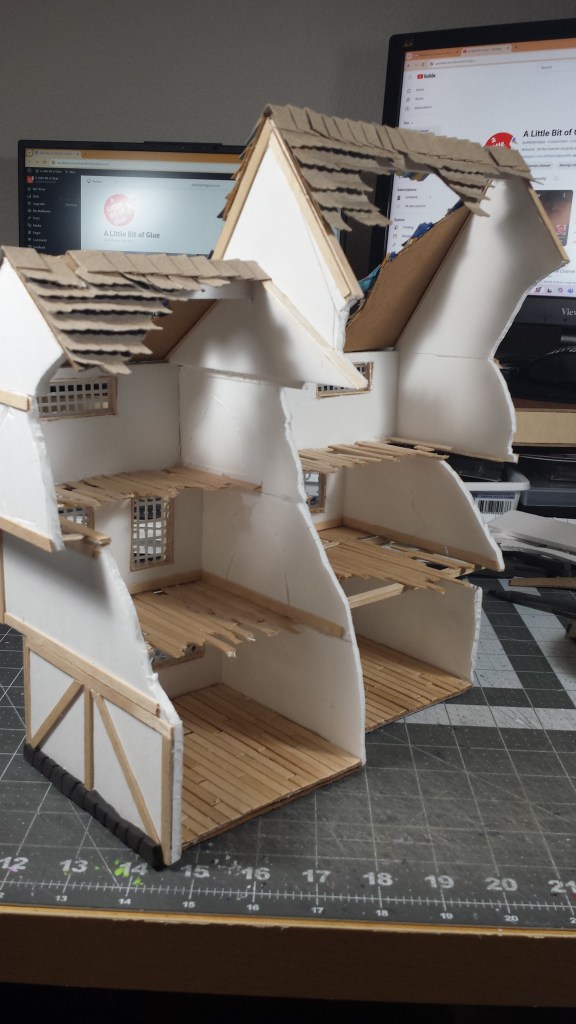
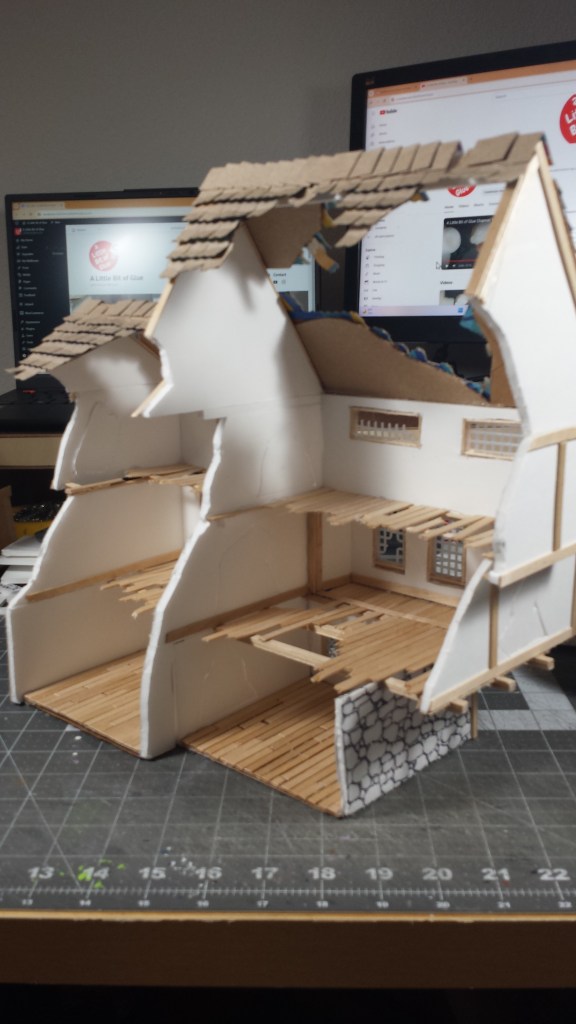
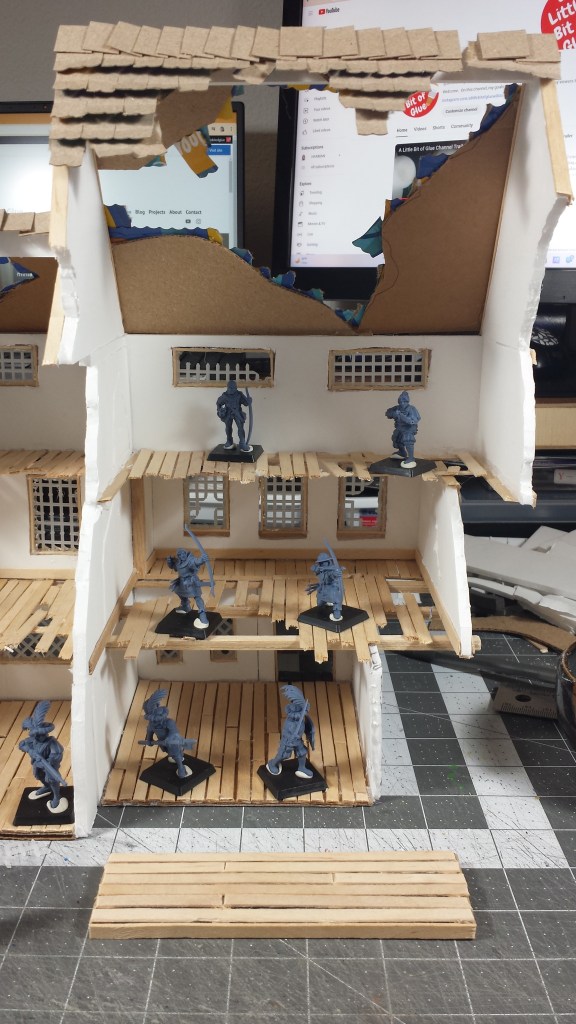
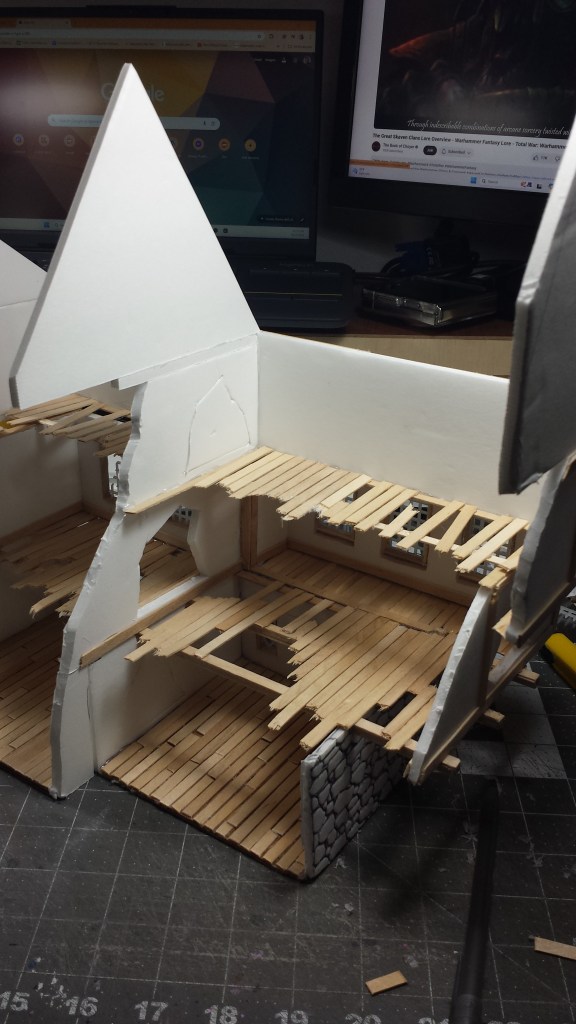
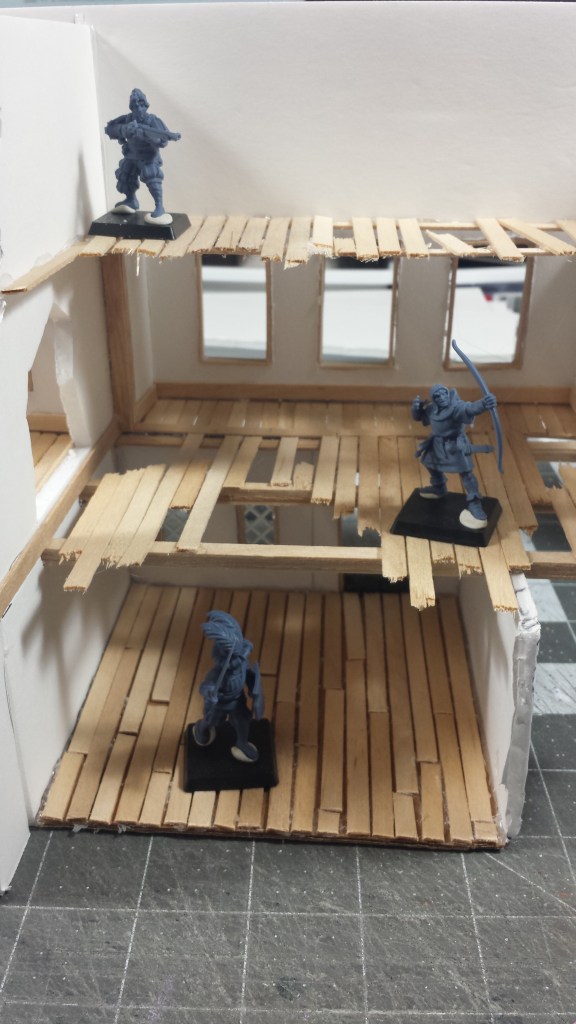
Also, I am thinking I may add another flooring level or makeshift platform in the “attic” areas to all shooting vantage points out of the ruined roof top.
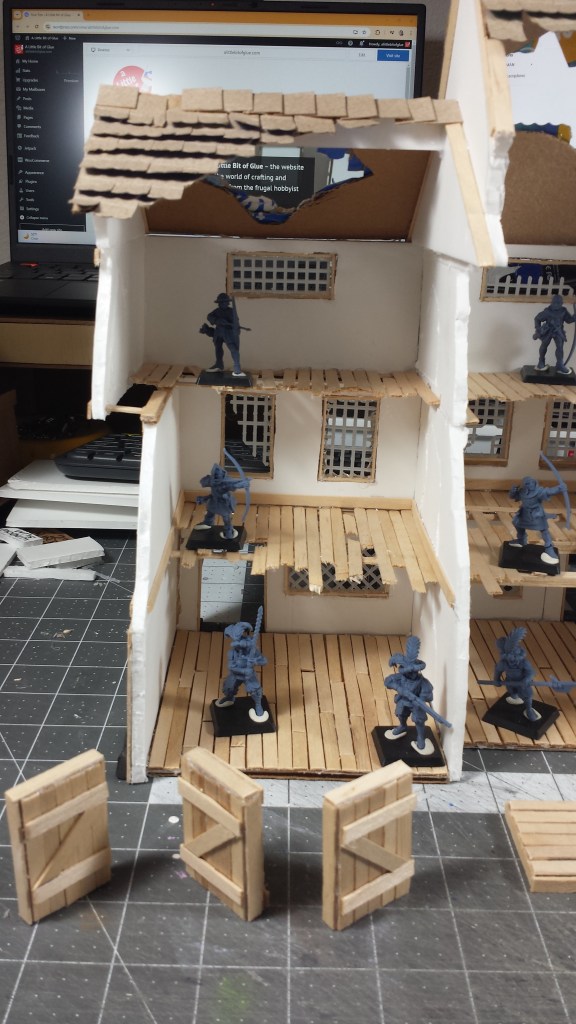
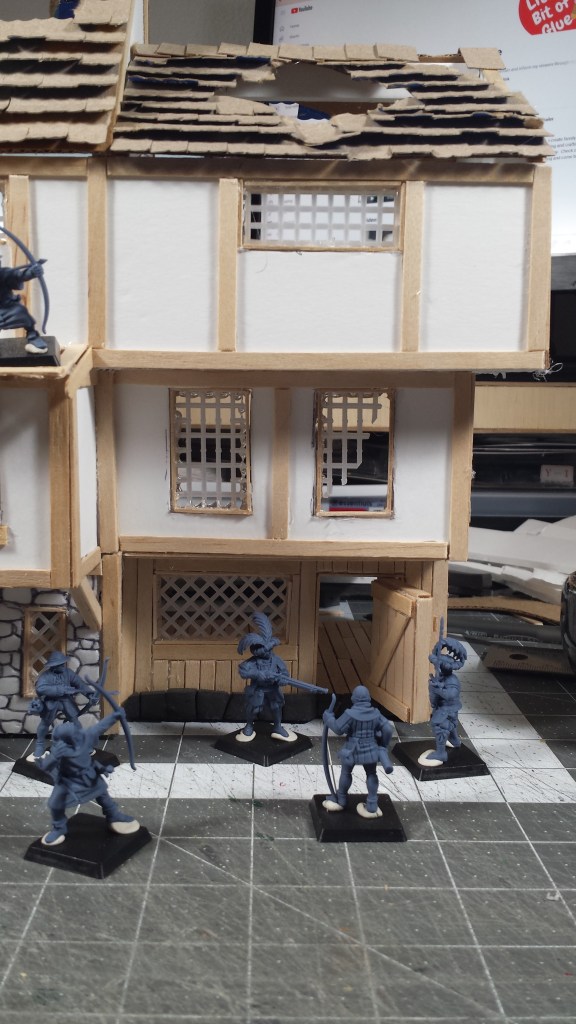
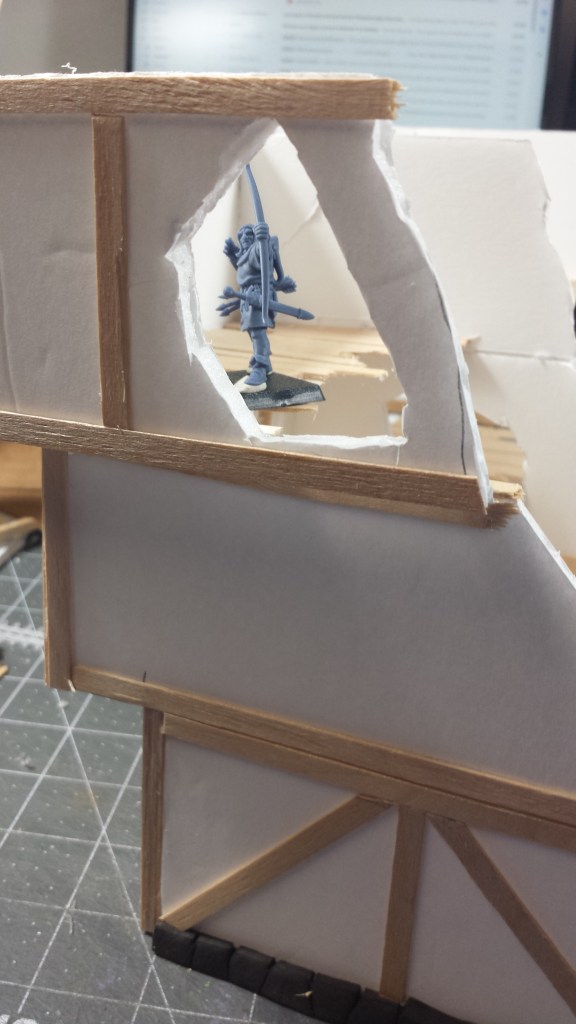
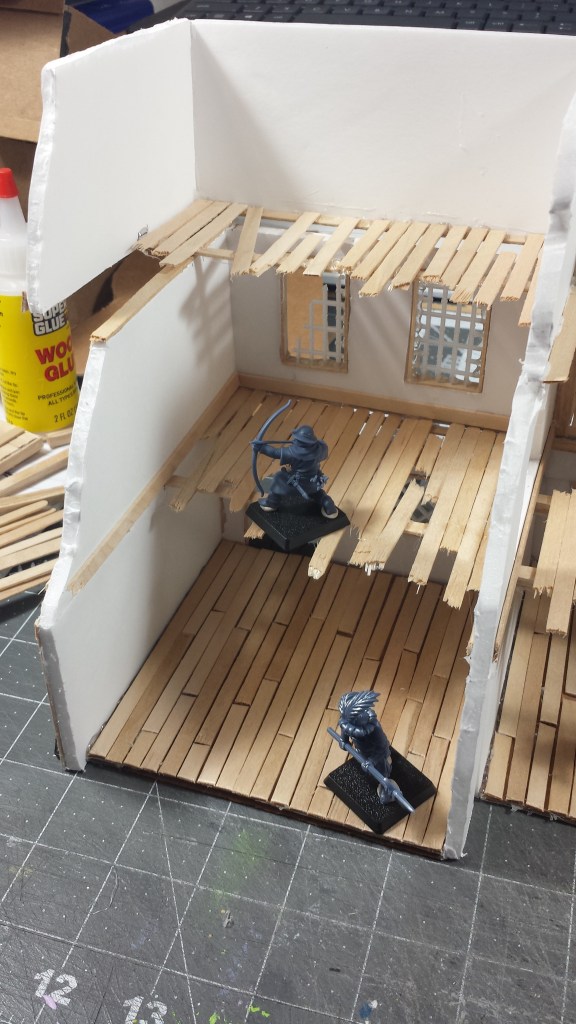
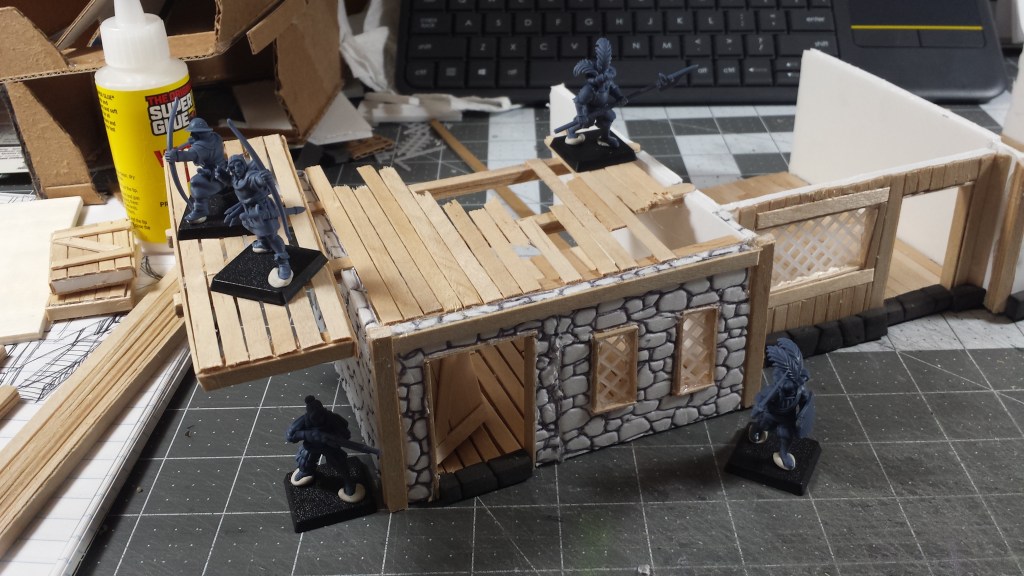
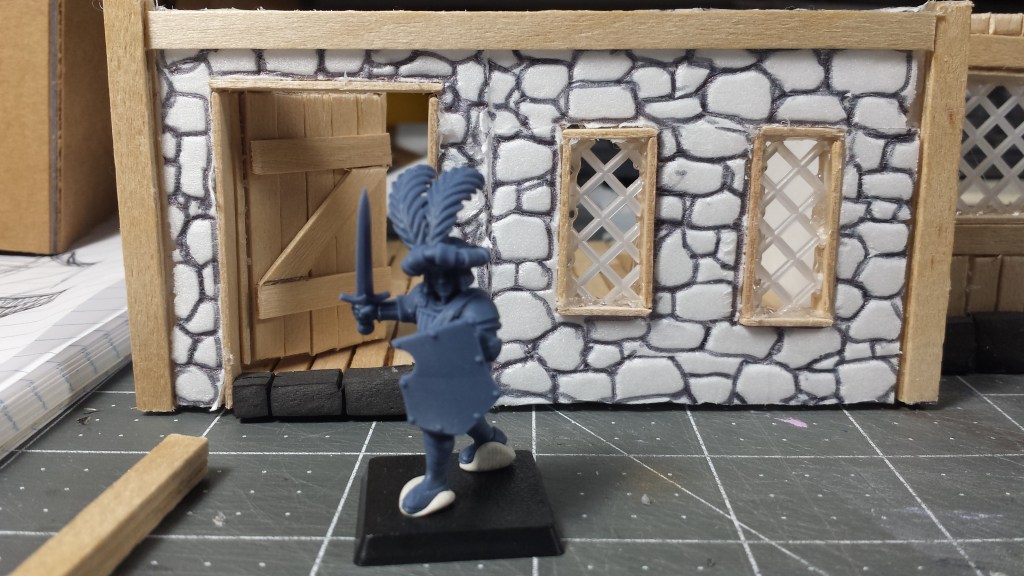
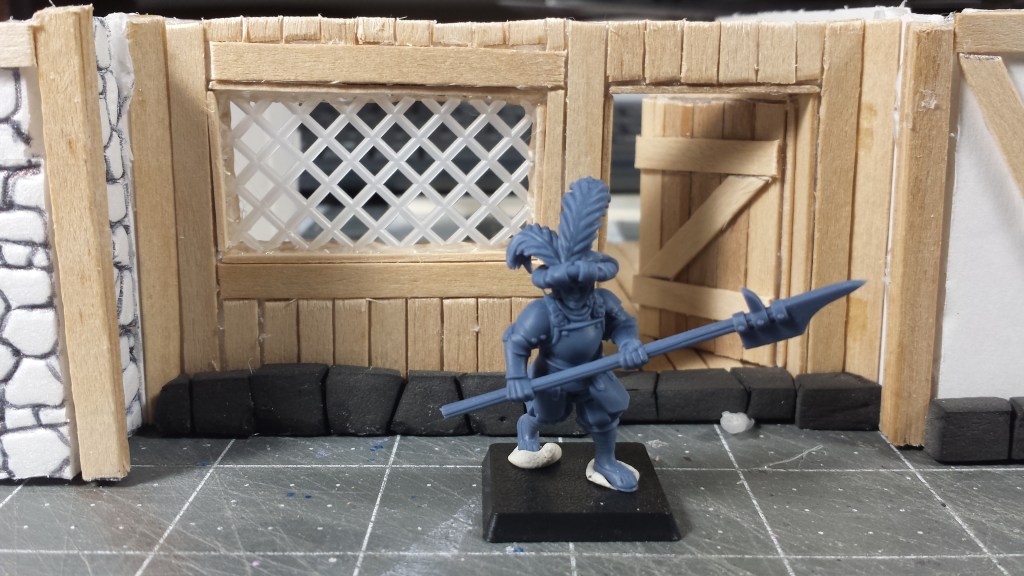
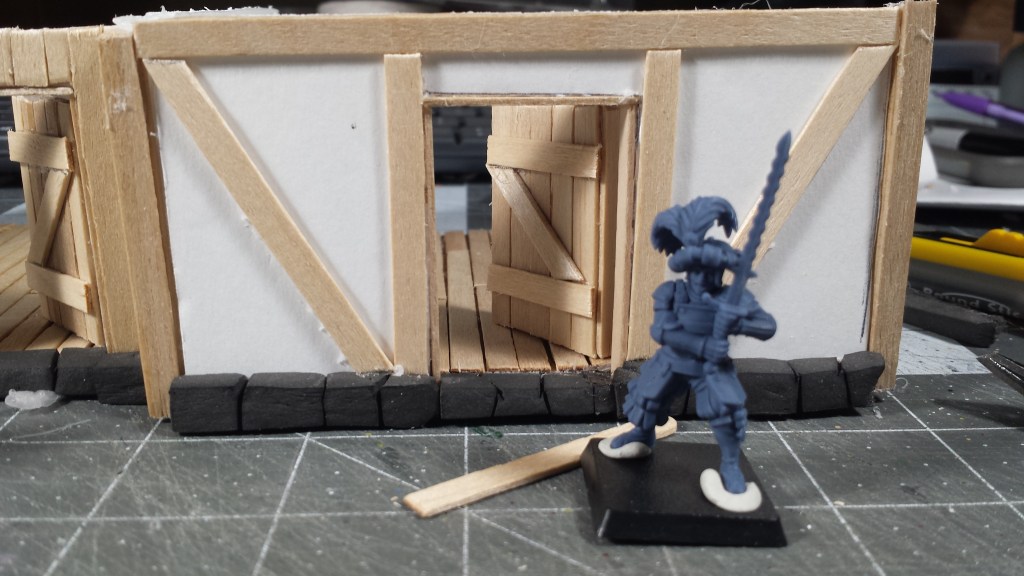
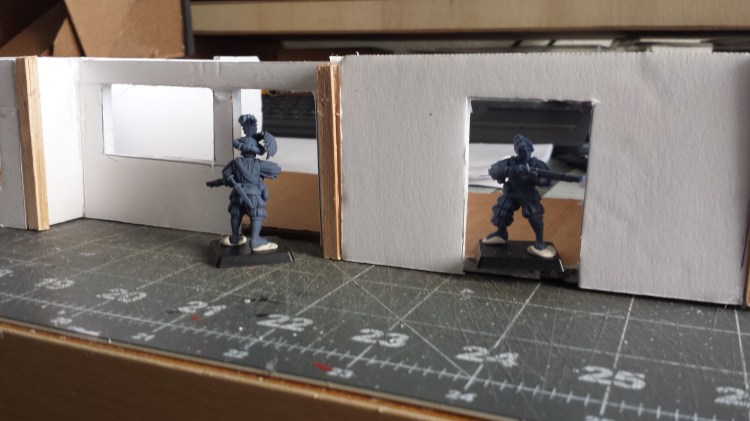
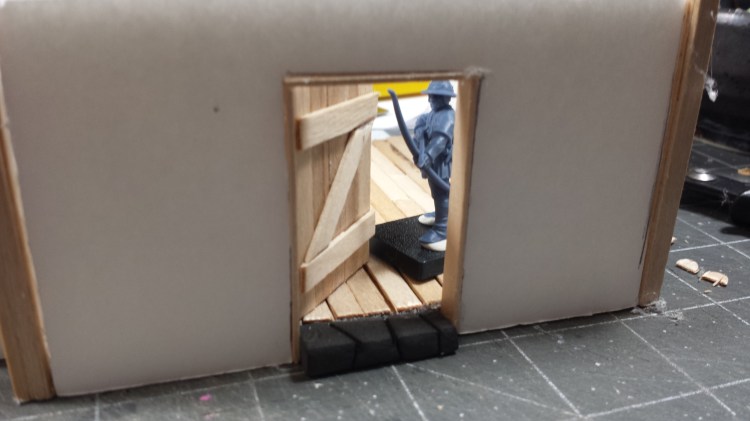
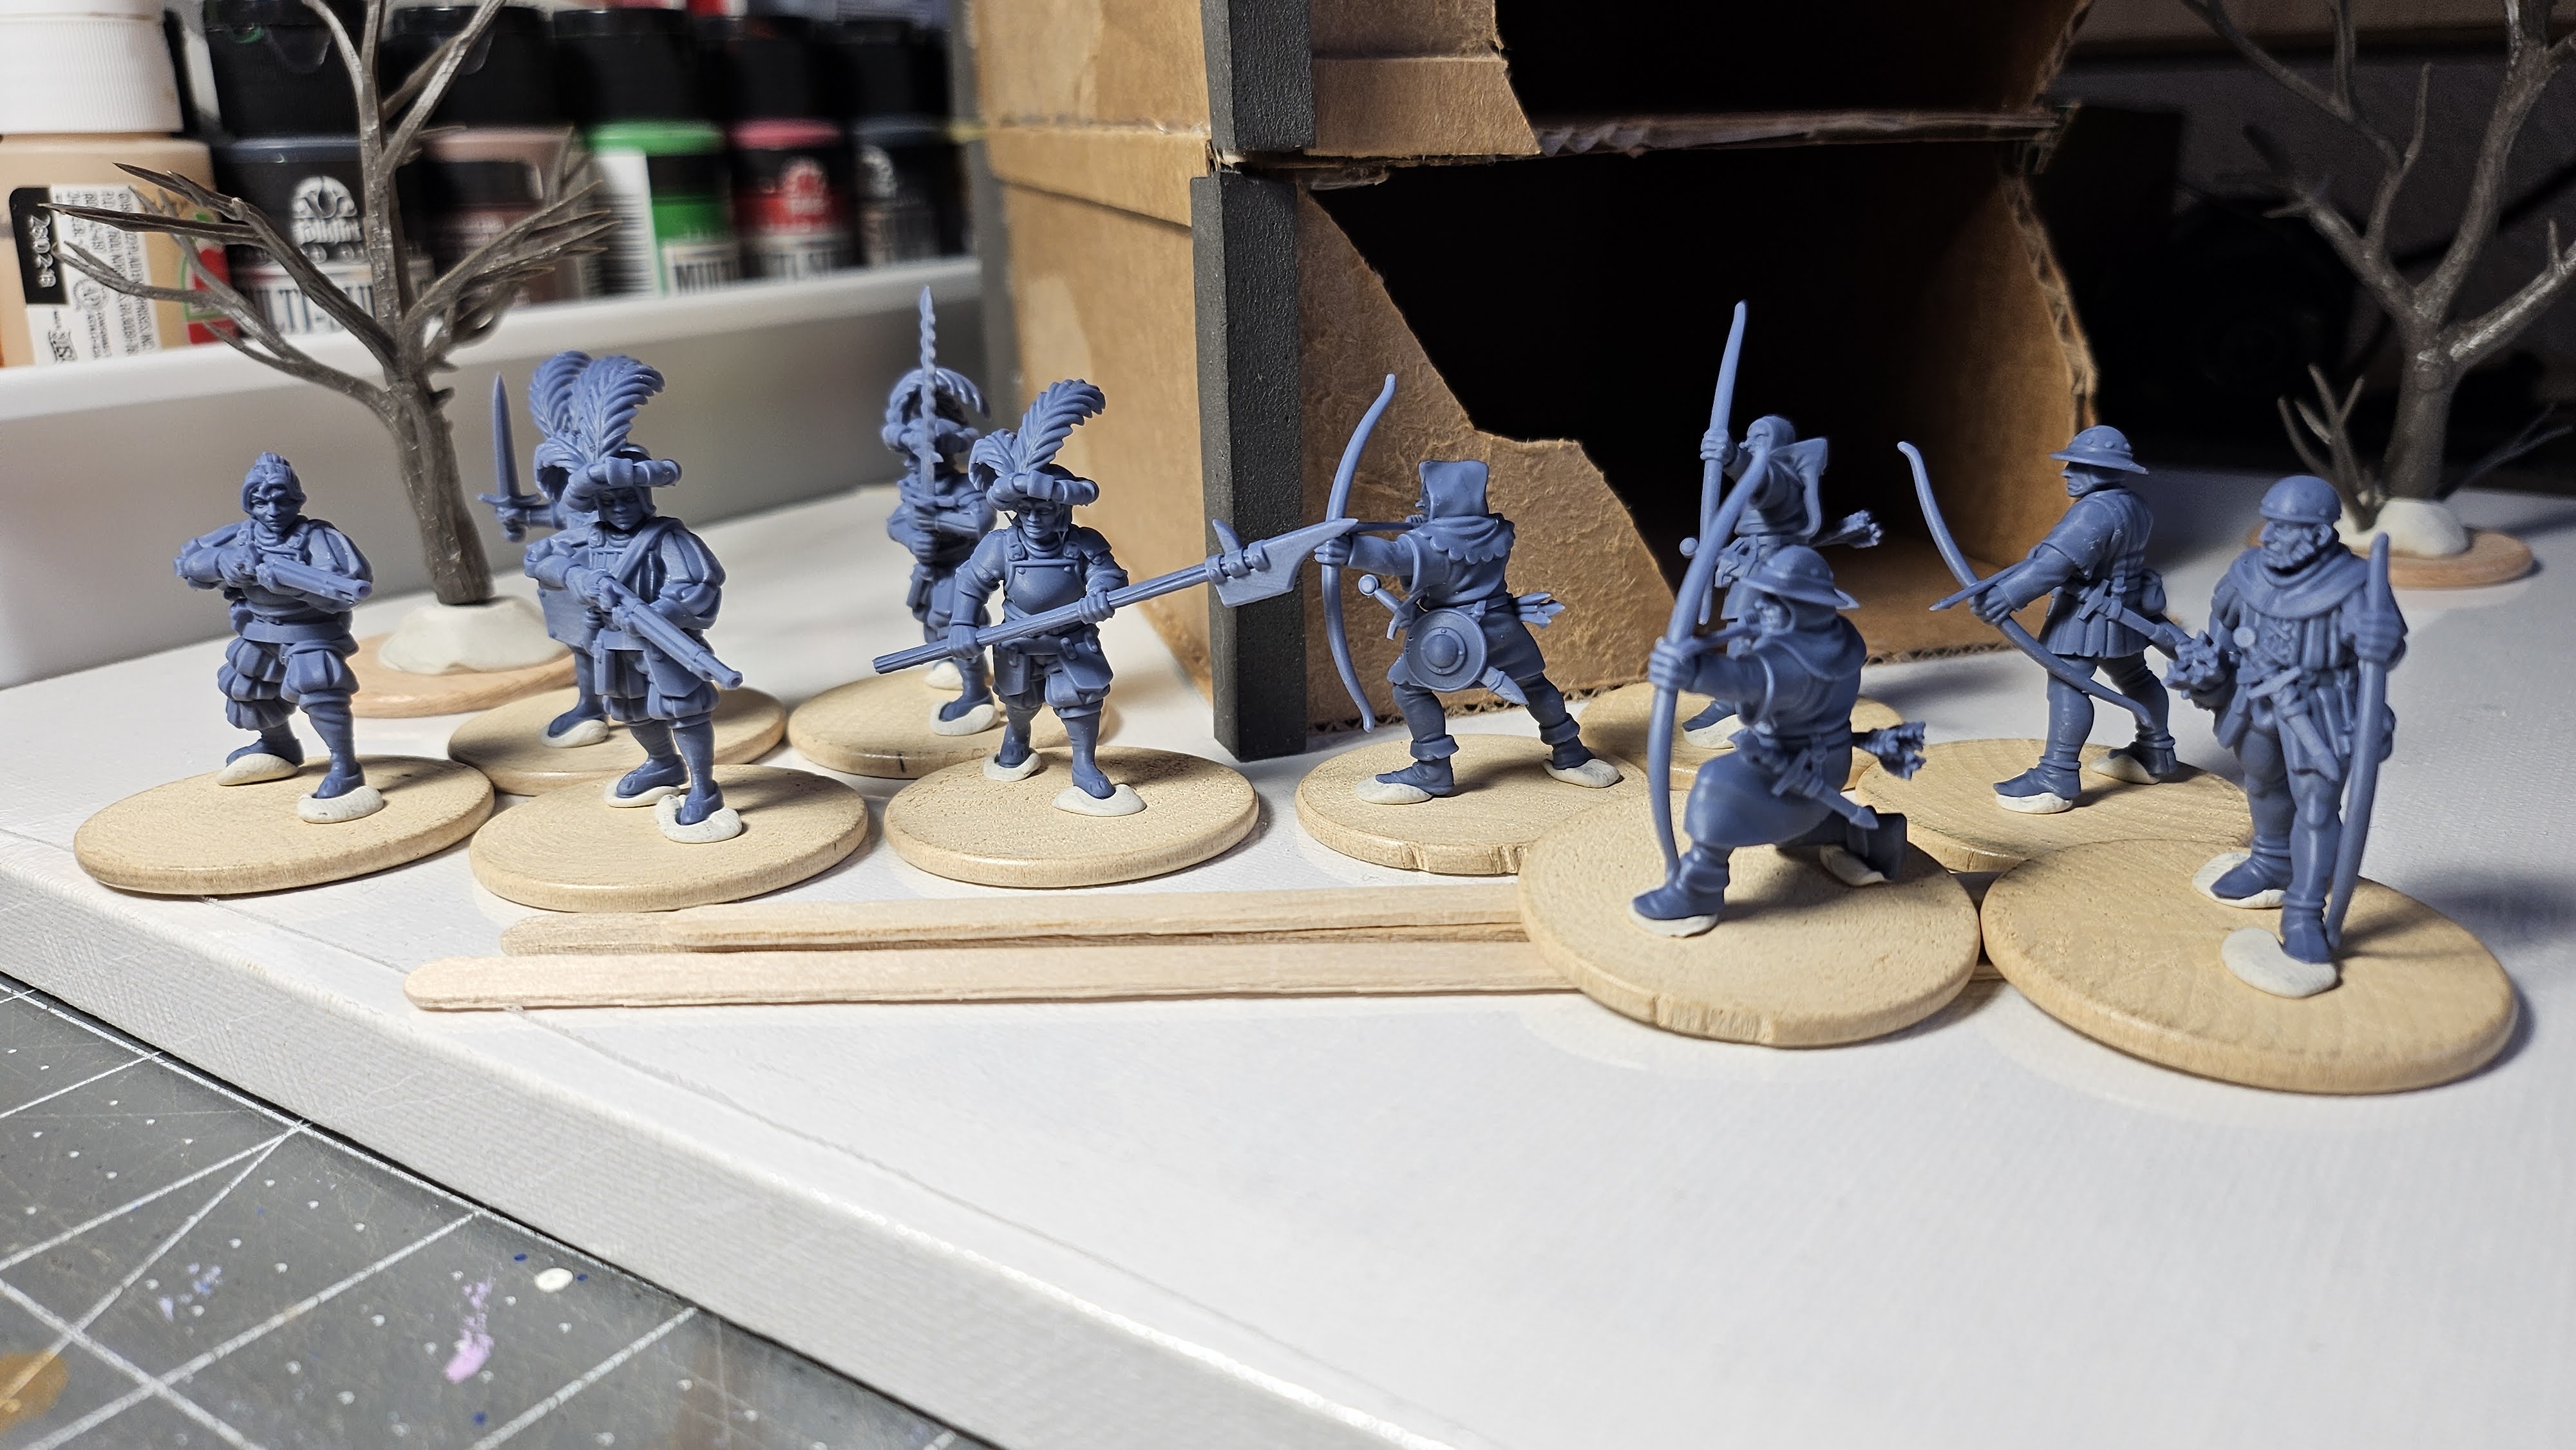
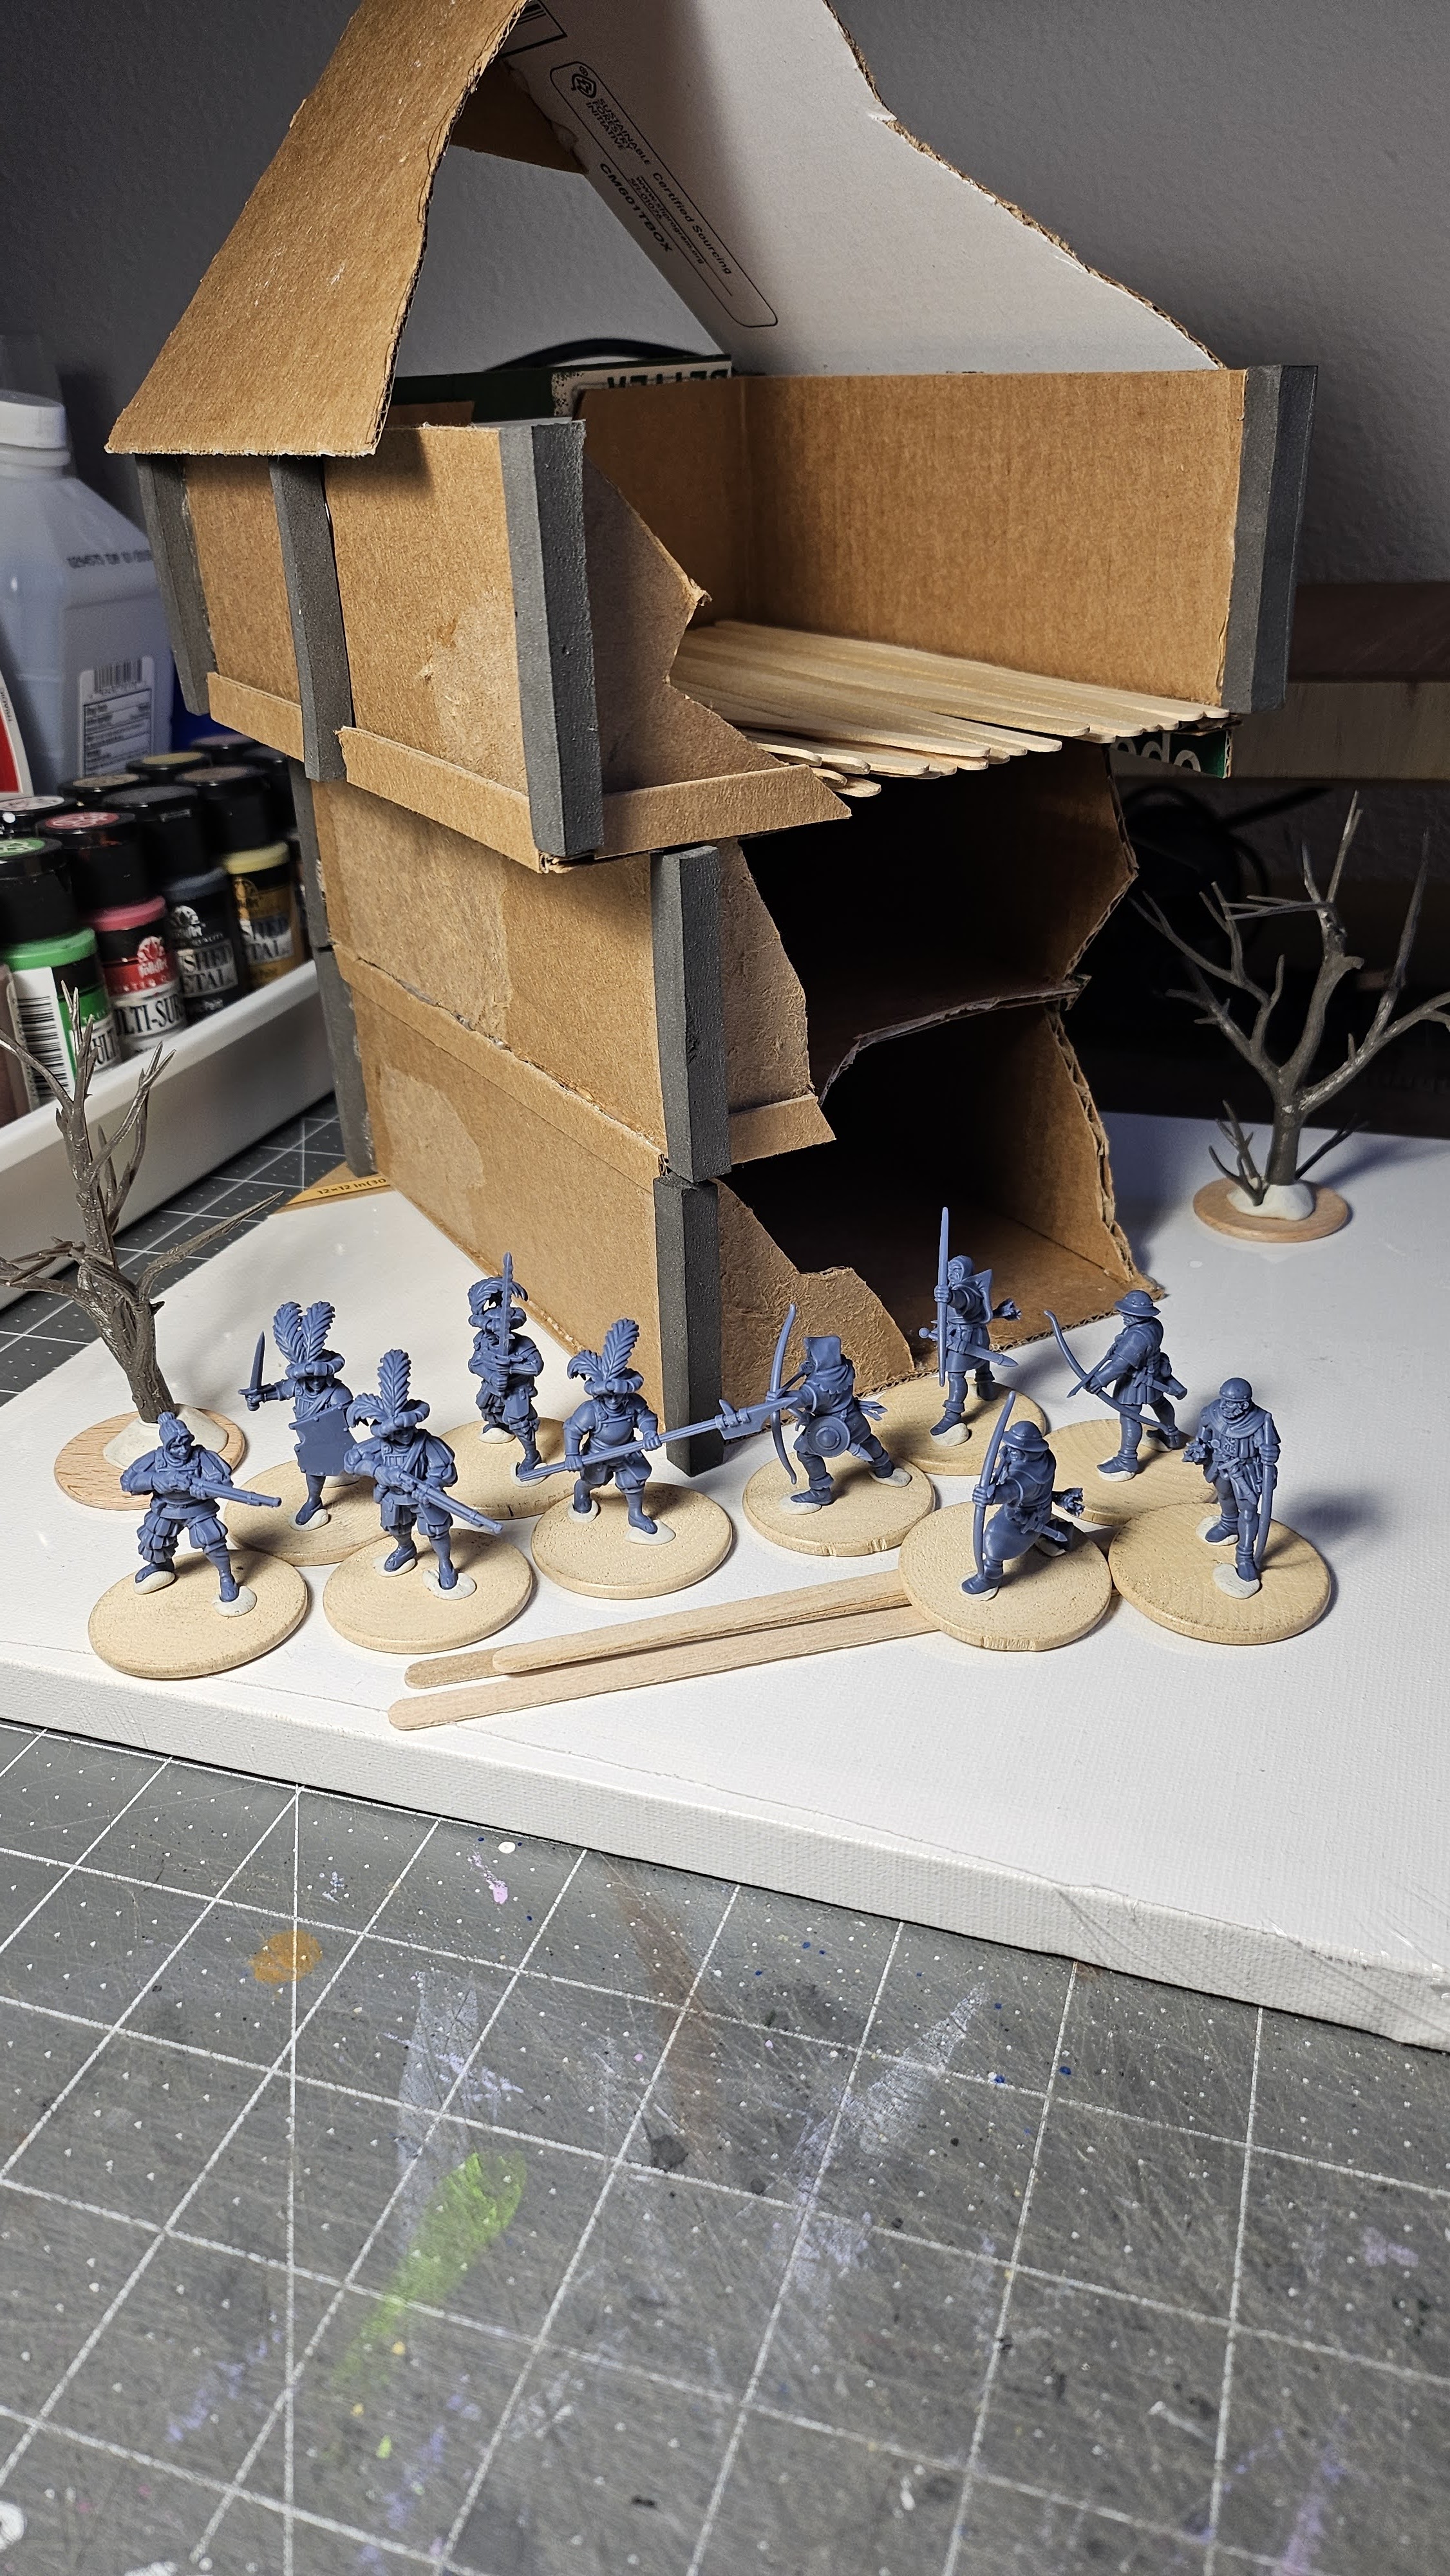
I finally had a small photoshoot with some minis to see what it looks like (before priming and painting). Check out the small gallery. BTW – I left the doors off for now, so I could paint the interiors easier. I will then glue them on ajar to give the appearance they were kicked in or maybe just left opened by the previous occupants.
Hi. It’s late. I know. I seem to be doing this a lot to myself lately. However, no matter how much turmoil life throws at me, I keep telling myself it is all for a greater purpose. One side of the roof is complete-ish.
I had this notion to create a network of beams that “supported” the roof planks. But then I thought, nah. I just cut out a section of cardboard to fit the roof area. A little bit of glue…see what I did there…and viola’ – a foundation to glue my roof shingles.
For the shingles, I used the proven method of employing pinking shears to cut a scallop shape of my “roof plate” material. In this case, the material I am using is old, thin card tissue boxes I have collected over a few cold/flu seasons. They are easy to cut with the pinking shears. If you can’t get a hold of these specialty scissors, I have an affiliate link to some off the Amazon site.
Hi. Some more progress today – Friday the 13th – although this probably won’t post until after midnight. I worked on the second and third floors. Again taking into consideration playable terrain as well as access by the humans or other manner of beast that move minis about the structure.
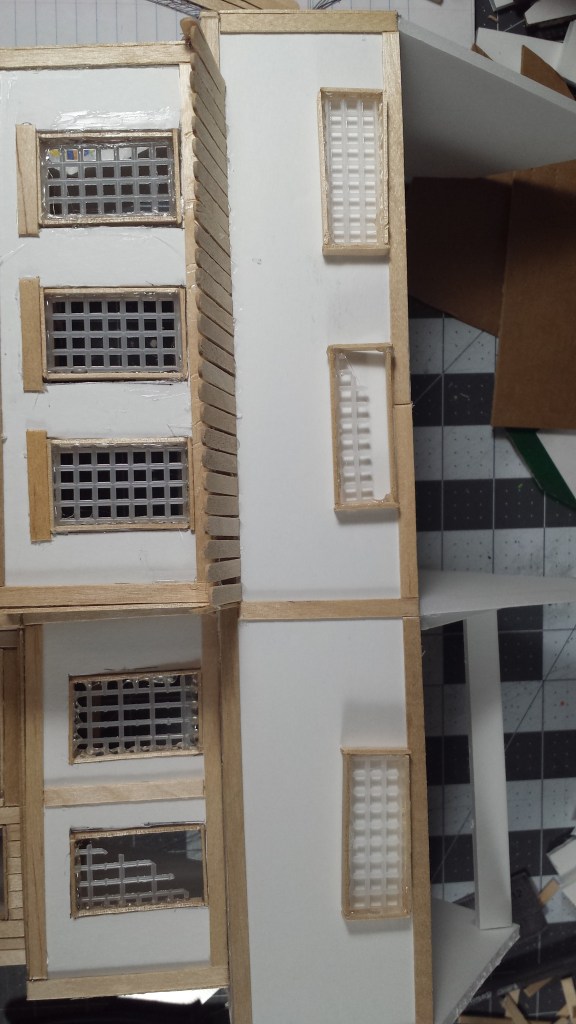
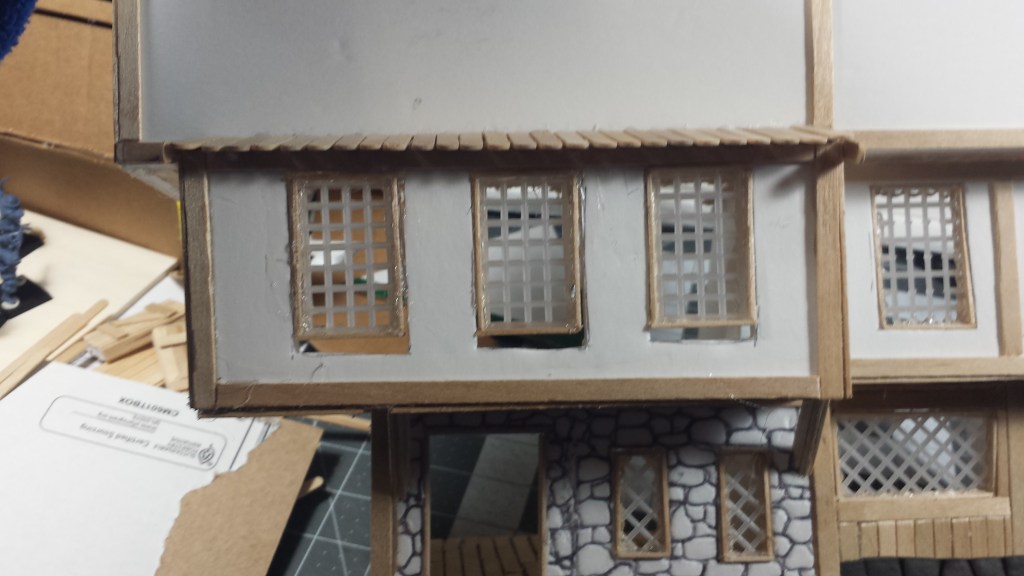
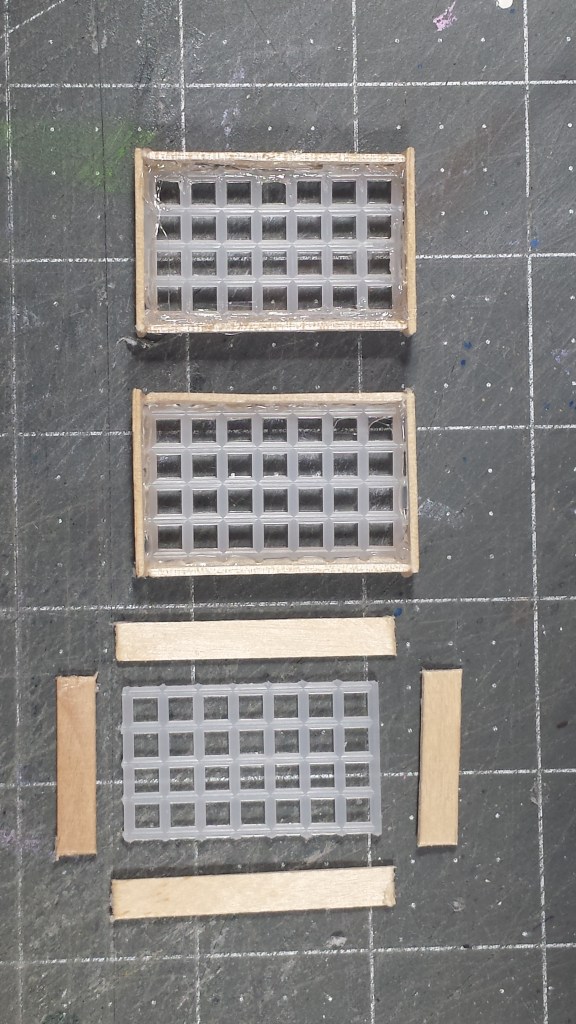
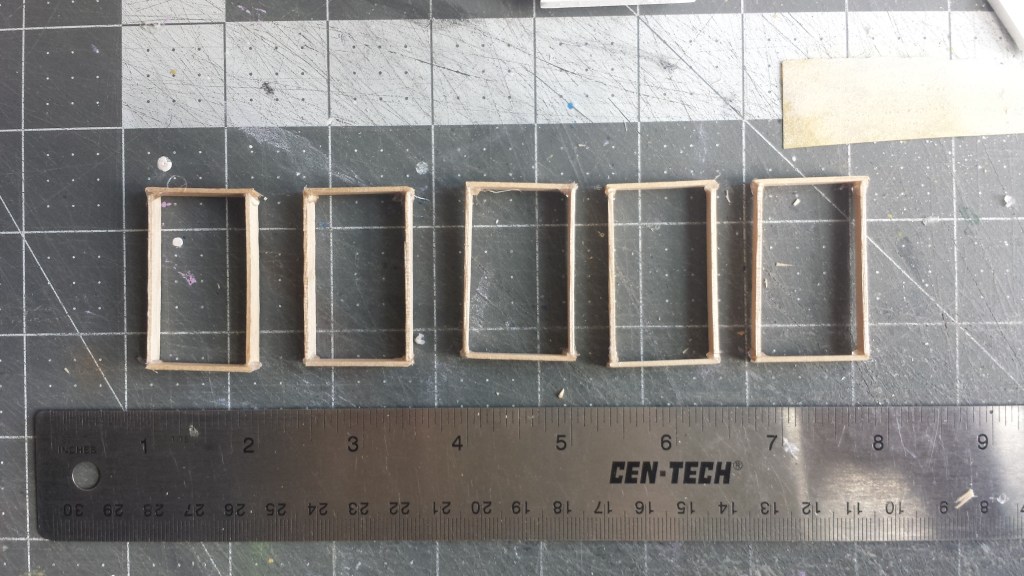
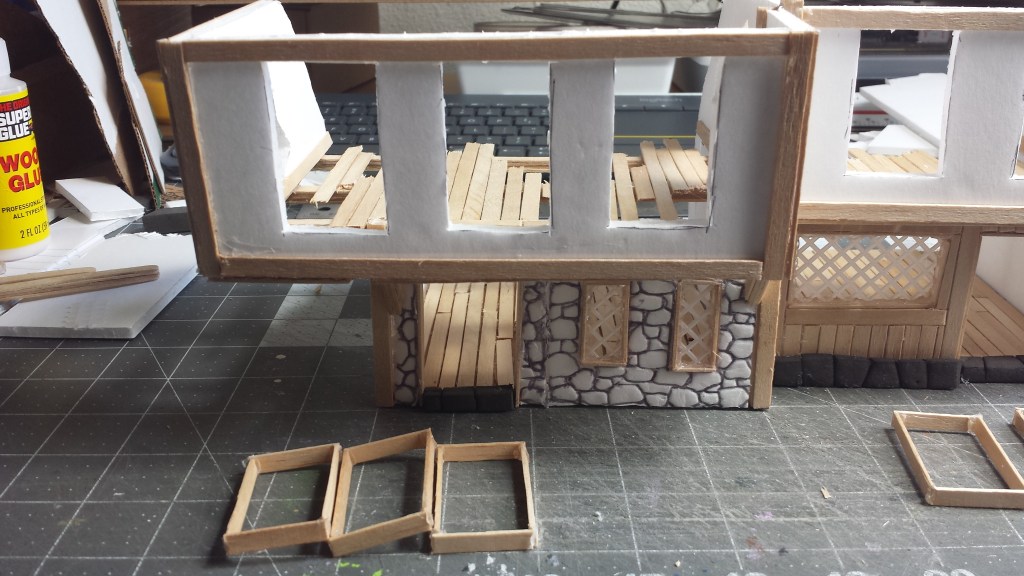
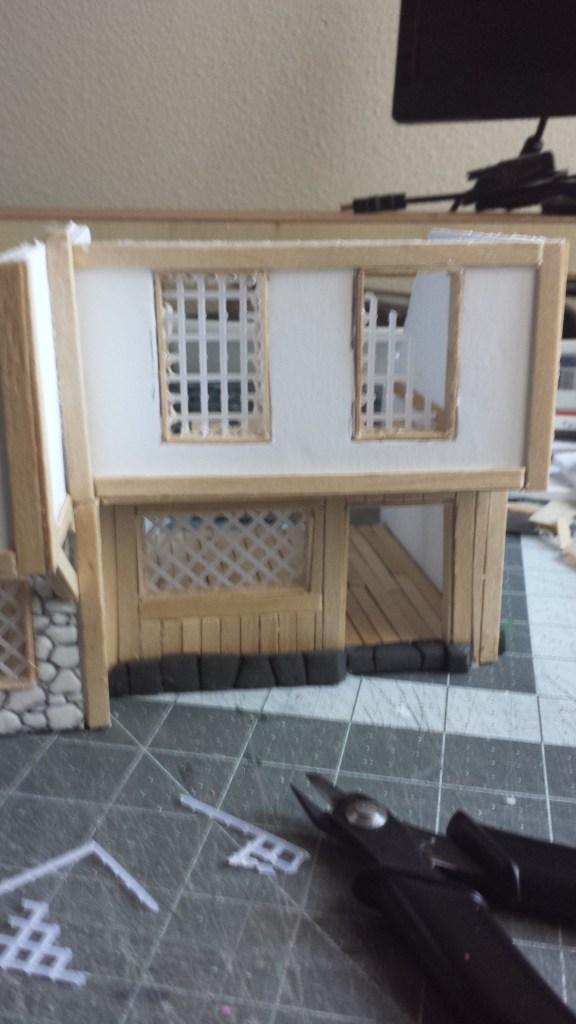
I also redid the windows to better streamline the build process which left me gaps from the resized windows. I ended up adding trim to hide the extra gaps. Whew!
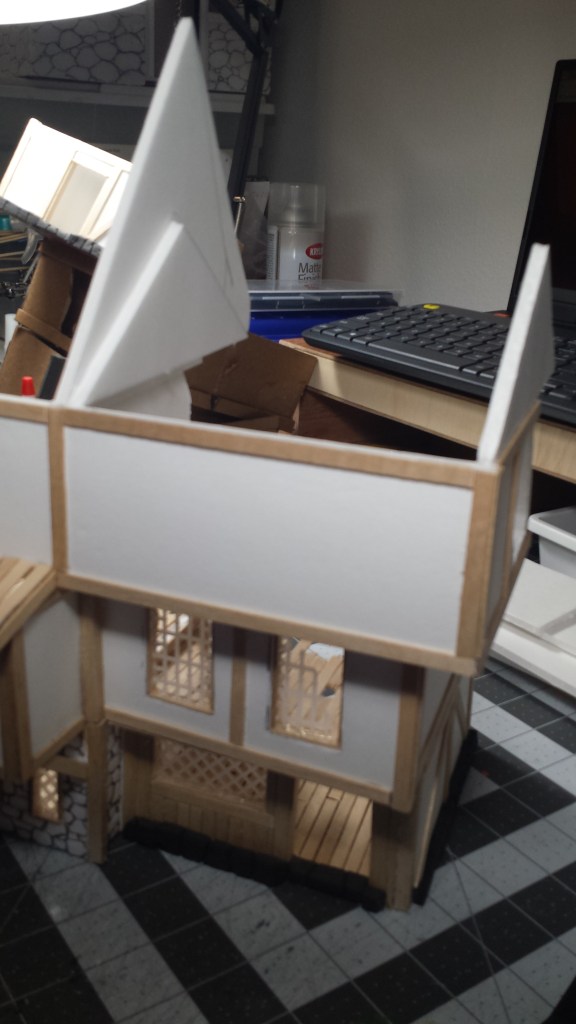
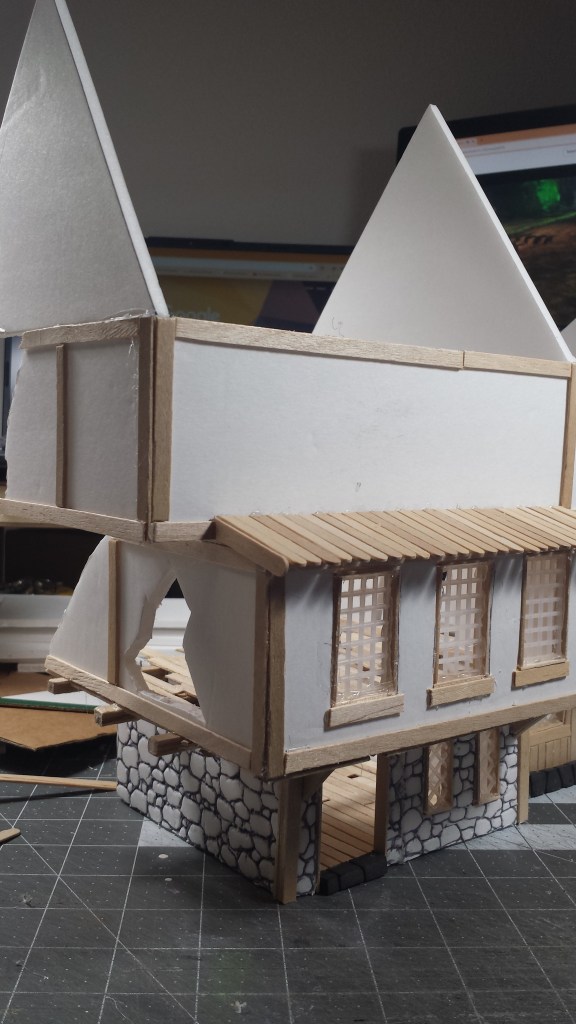
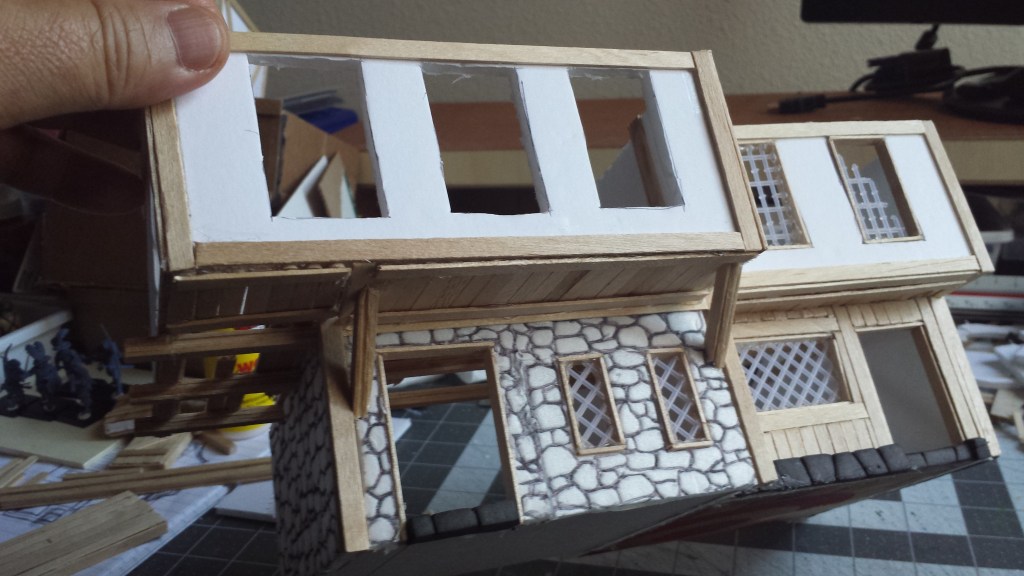
I also added the upper walls that would eventually support the rooftops. I wanted the smaller domicile to have a different roof pitch. I will start adding the supporting beams tomorrow?
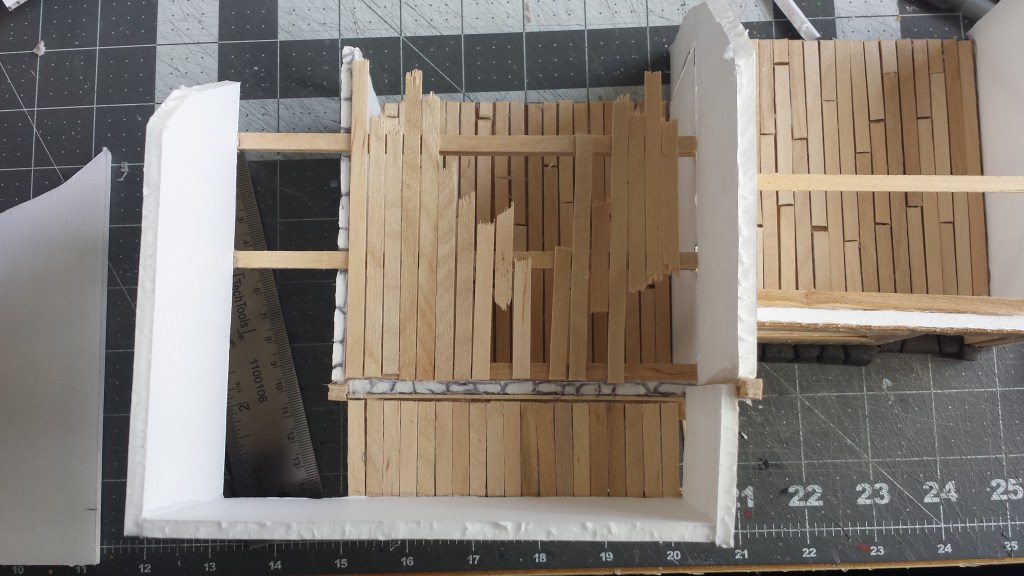
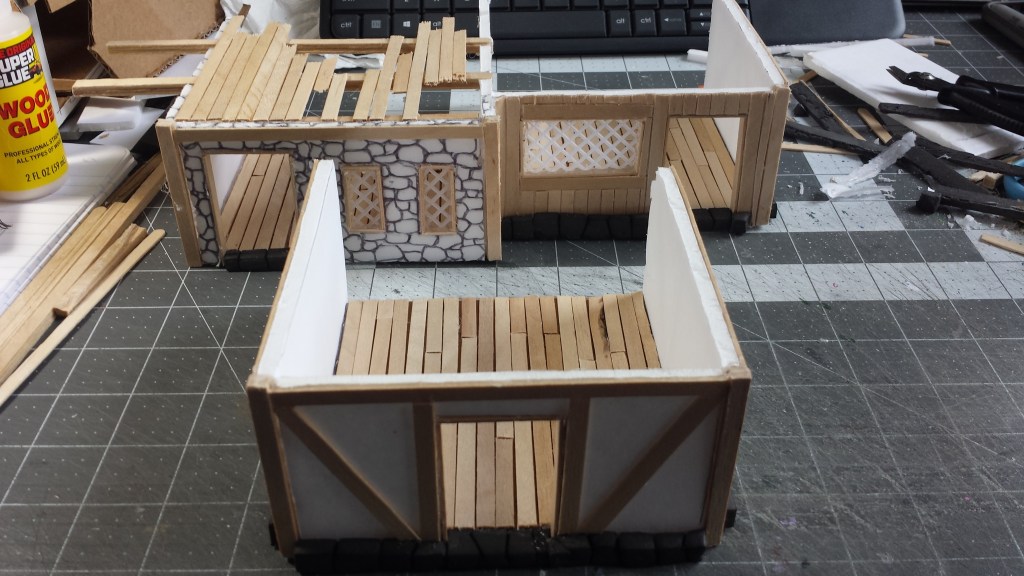
On the second floor, I created a mini roofline on the front of the building to act as a slanted walkway. Maybe players can run along that roof to jump to other buildings or have an elevated shooting position? I still have to figure out if I will created a window opening or just cut out an opening. TBD.
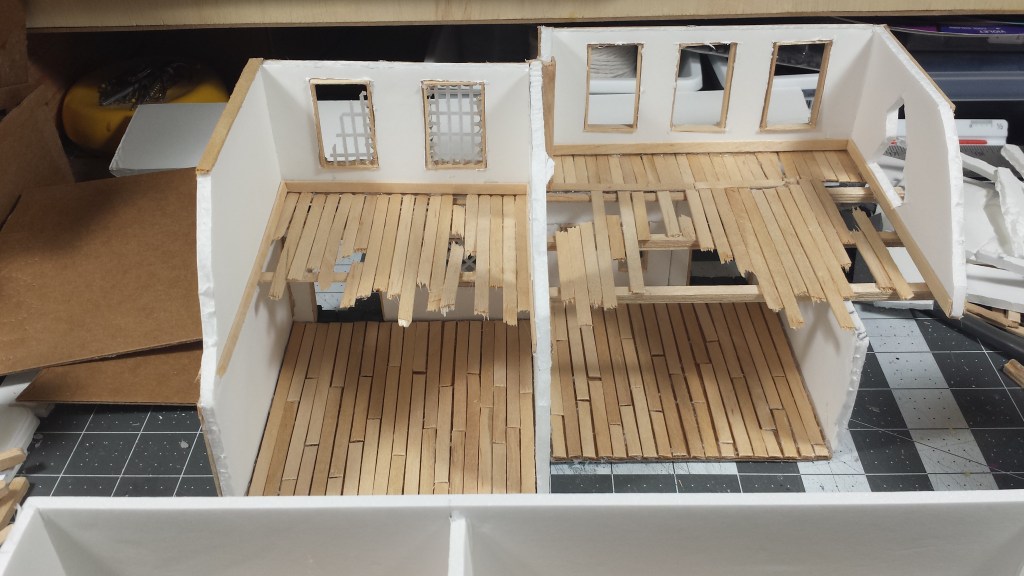
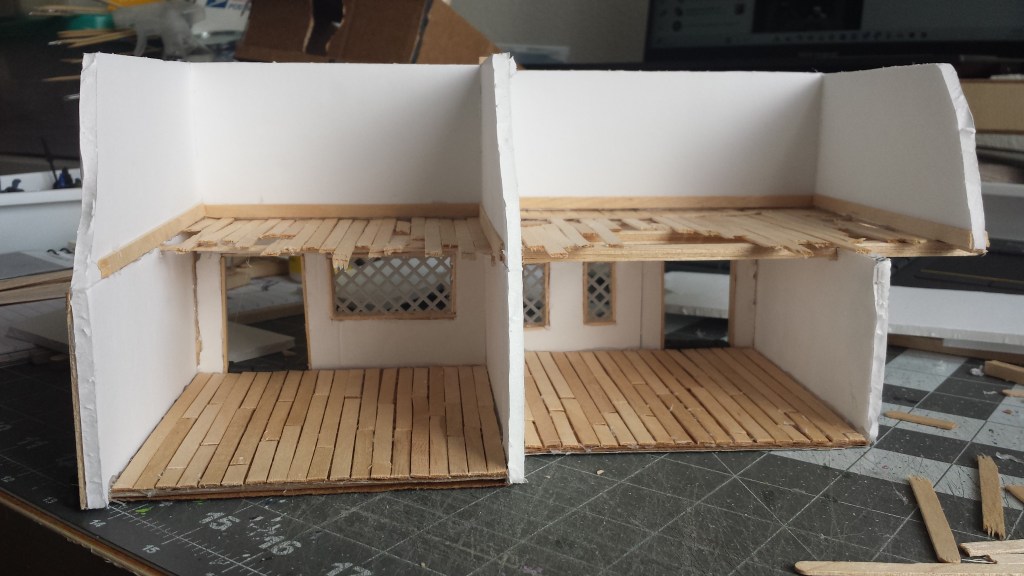
Hi. Just a brief update today. Started on the 2nd level with gameplay and access in mind. Can players access their minis on all the current levels? Is there enough room for player’s hands to get in and move minis about in the structure? Did I break off enough stir sticks to cause instant splinters for players? (Probably)
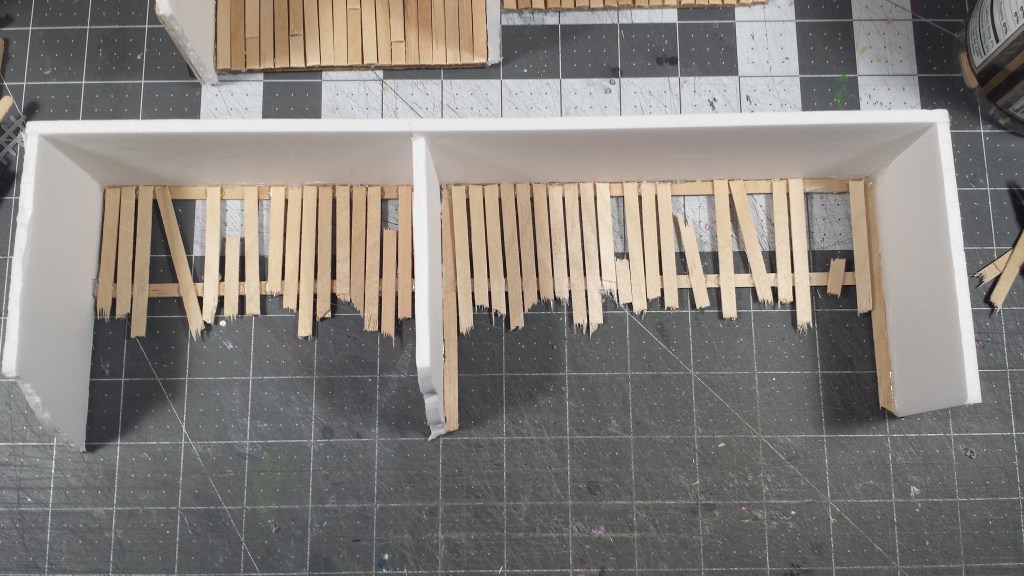
I spent a short time today adding a second floor. I had no plans. I winged the entire level so far after I split the structure into two sections as documented in my previous post. What am I even thinking? I’ll tell you. Just get past this first building build. I can do it!
I also realized there were no windows to enjoy the chaos occurring on the streets of the damned city so I started making windows. There are definitely lessons learnt on this terrain project. Making windows at this small scale is tedious. No 3D printer or laser cutter yet in the budget, but I always wanted to try molding and casting (like in the olden days)
Hi. So I did some thinking. You know how bad it is when you get to the point of having to think. Why is it taking me this long to complete one piece of terrain? Granted, this is my first real foray into the fantasy world and mini-wargaming scale construction. I was on what I thought was a roll. Then that ol’ noggin’ started up.
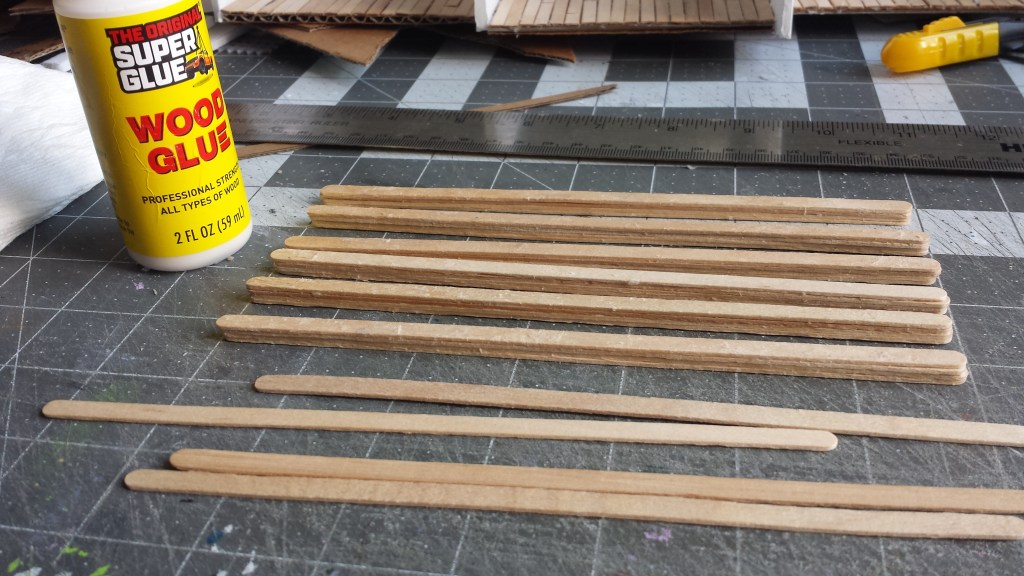
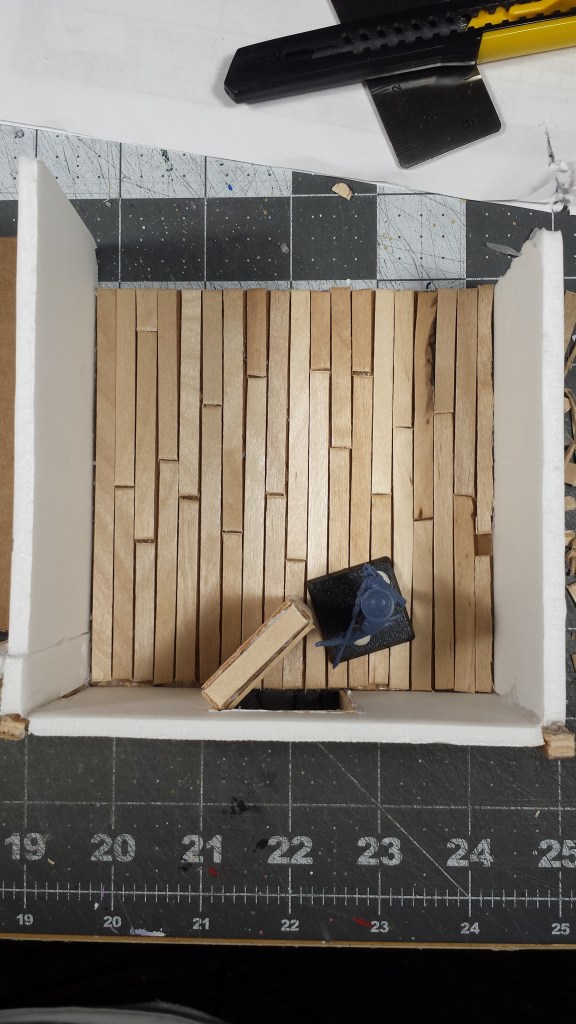
I did stay up a little bit last night as well to start on the second floor. I though I should make some beams. Without having picked up some .25″x.25″x12″ balsa to use, I ended up laminating some stir sticks (4) into a somewhat square beam using dollar store wood glue. These would be glued into place to support the second floor much like a “real” home. I even started to lay down some flooring. And in the olde world fashion, I did break the boards for a damaged floor effect.
METADATA-STARTMETADATA-START
Silly me. Let’s make an elevated walkway for more player choices on the terrain board. Having done so, I again, called it a night leaving an update until today.
METADATA-STARTMETADATA-START
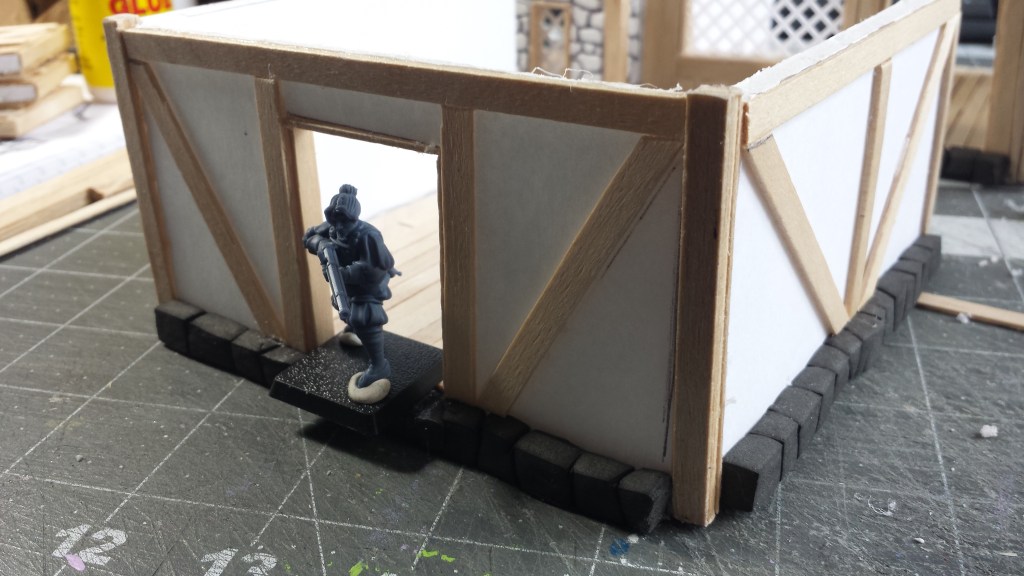
Which leads us to today. I looked the terrain piece and I thought this was a little too big. But how to downsize? Well, cut off one of the adjacent structures. Thus one building foundation, became two. And I basically spent the past hour adding stonework along the bottom edge, some inlaid wooden “planks”, as well as rebuilt the walls (out of foamboard).
I know. I am overthinking it. Just get this initial project done. Use what you learnt to make the next one better.
Thanks for reading and keeping up with this project. See you next time.
Hi. I know I said I would post yesterday, but I’m too old and I got too tired to post. So here it is. Worked on the front of the rowhouse ground floor some more. As I did, I started down the rabbit hole of doom scrolling the socials before I realized, I need to stop scrolling and make some progress.
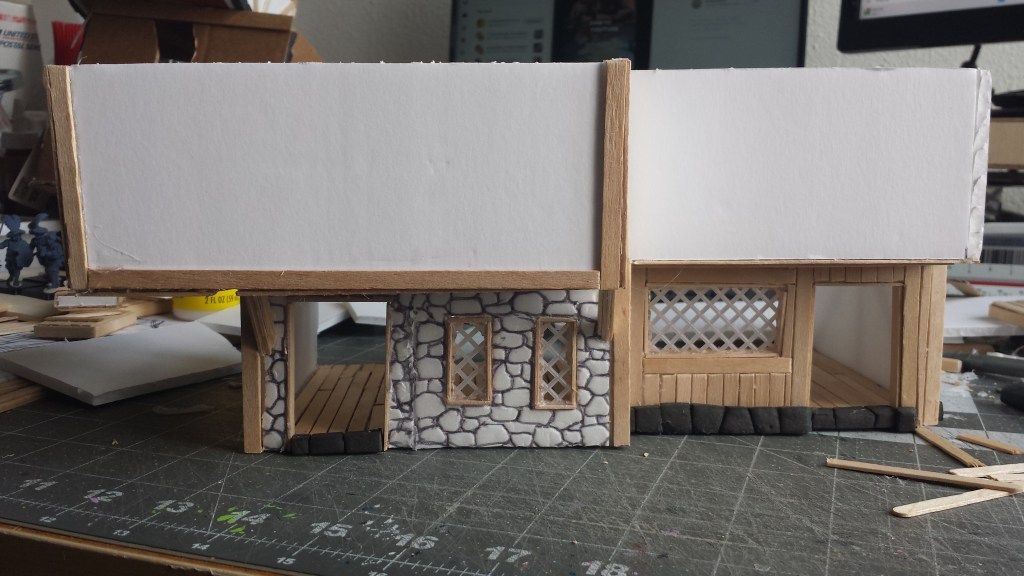
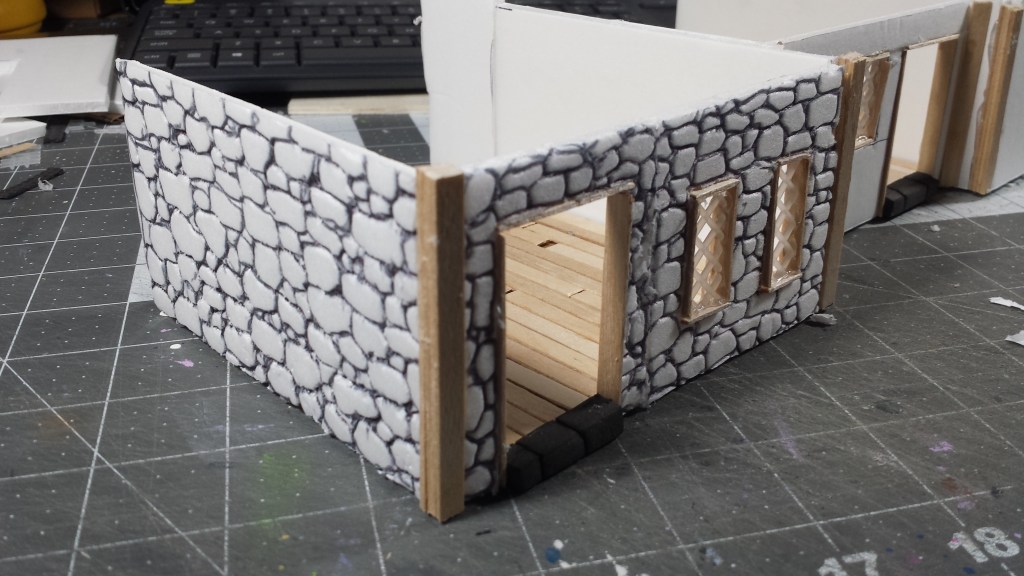
Here is the facade so far. The first pic are stones drawn into the foam core (I removed the front paper layer). I just used a ball point pen to score and draw the stones of what I thought a good size would scale nicely with my minis (technically I bought the minis printed at 32mm scale).
METADATA-START
As you can see, I also drew “stones” on the side as well. It actually took me some time. Don’t know if this is the most effective, time efficient method though.
METADATA-START
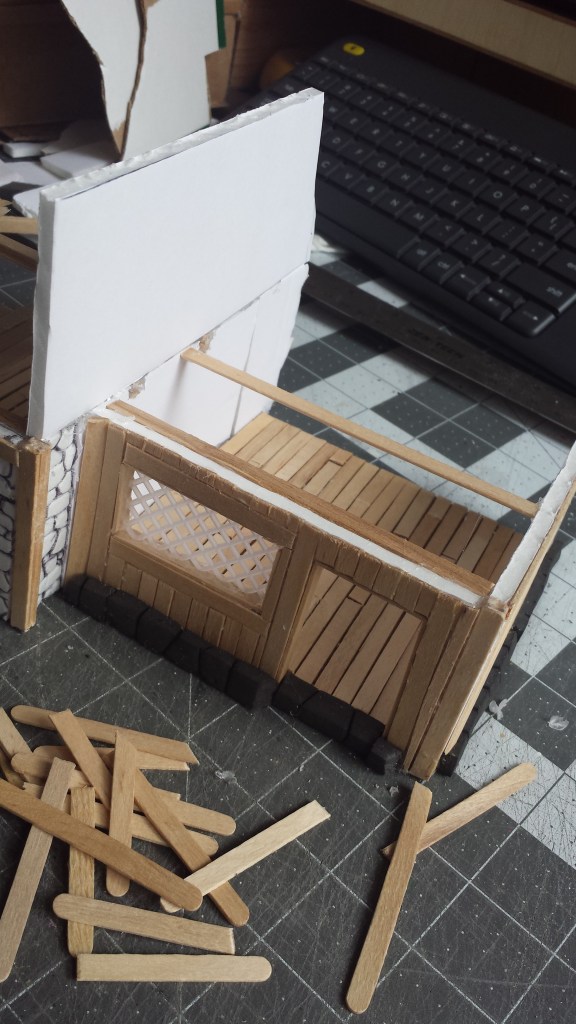
Next is the middle house which was just clad in wooden stir sticks that were hot glued on. It also a little while because of the shorter pieces that were glued in place, then snipped to fit. I also added some EVA foam stones to the bottom as I guess it made more sense than just plain “wood” touching the ground. I don’t think they had pressure treated, ground contact rated lumber back in the olde world – real or fantasy – or maybe THEY DID?!
METADATA-START
The remaining facade I simply hot glued some stir sticks to represent wall support planks that also offered some visual interest. I kept the outer wall blank for now because I am think to add some “mini-friendly” stairs or maybe a ramp to the second level? I am thinking in terms of playability. I used to play a lot of FPS like Counter Strike and watch my kids play Fortnite a lot, so I wanted to have that feel in the terrain where there are options for cover, concealment and access.
METADATA-START
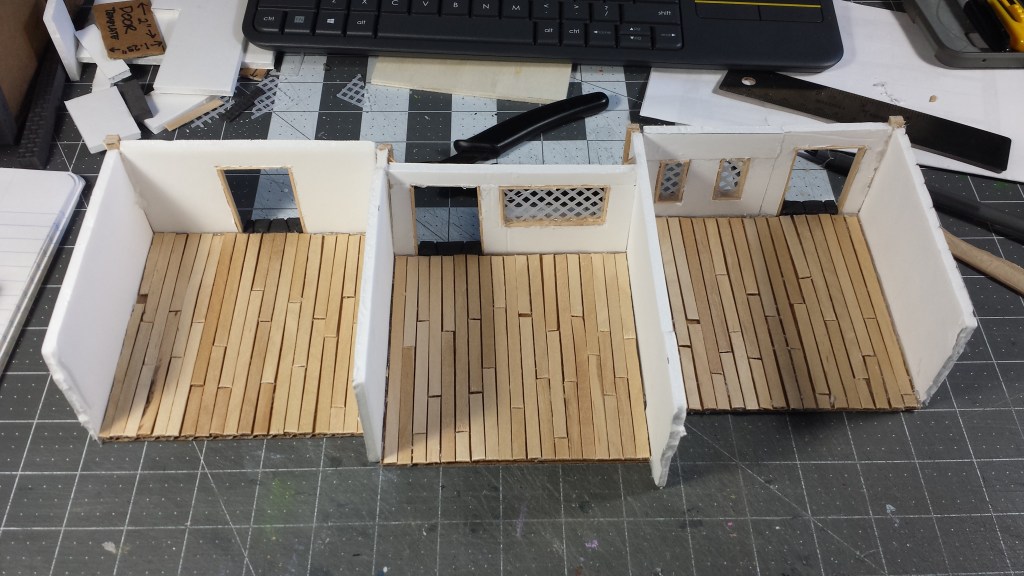
I also finished off the wooden flooring. I did not glue in the doors for ease of painting, but I am thinking to make hinges for them or maybe leave them unglued
METADATA-START
Anyways, that’s it for now.
Thanks for reading. Let me know what you think in the comments below.
Hi. I am back. This time, I am continuing to explore the fantasy world setting in the old city of the damned. I initially created a test building a few weeks/months back. One – to see if I could get myself out of this funk I have been experiencing for some time now. Two – to see what it takes to create some terrain from concept to completion. And three – to see if I can accomplish this in a short amount of time, money, and resources – hopefully living up to my blog’s creed to provided this sort of content.
With some new and previously acquired minis for reference, I began construction by cutting out the bottoms of my test building to be used as the base floors for this new project. Re-use and Recycle! Using the knowledge I have acquired from my unlimited resource library (i.e the Internet, or specifically – Google), I plugged in my low temp hot glue gun and “went to town” Here’s what I did so far.
Inspiration. There is so much out there that I got lost in the mire of information I found, Google images, YouTube and other social media creator’s posts, and so much more. I said to myself, “Stop ‘researching’ and ‘just do it’. It will look bad. It will take you a long time. You will make mistakes.” But then I also came to the realization that “if you don’t start, you won’t get to your destination”. So here goes…
Gather Materials. Too easy. I am a hoarder and collector at heart. Most of these items sat in 18gallon storage totes for years with the notion that “I will use these ‘one day'”. Well that day has arrived. Well, actually, yesterday – Sept 8, 2024. Why that day? Why not. I have loads of carboard, foamboard, EVA foam, glue sticks, CA glue, utility blades, rulers, cutting mats, and more recently, coffee stir sticks and granny “mesh” (Check out my materials page affiliate links if you are having difficulty sourcing materials and tools locally – clicking the links is free to you, but if you purchase something, I get a small commission with goes towards supporting this website and content creation endeavors)
Foundation. Every building should start with a solid foundation. I took mine from my test building. I cut out 4.5 inch by 4.5 inch (@11.5cm/sq) squares from the corrugated carboard floors of that original 3 level project.
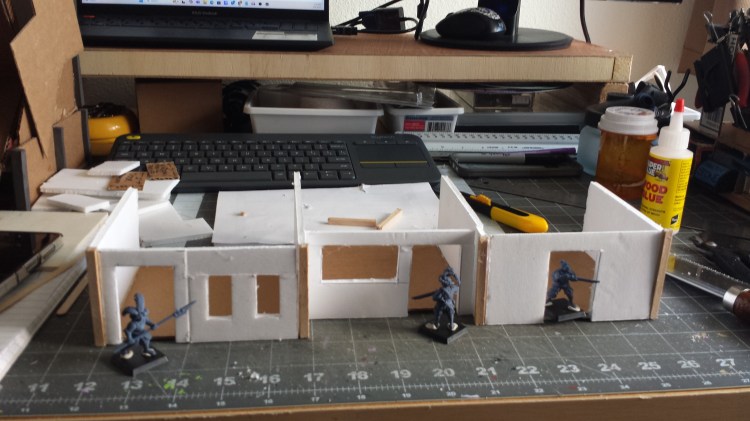
Walls. I used 3/16 inch (@5mm) thick foamboard, hot gluing the sides to the perimeter of the cardboard base rather than on top for, you know, “reasons”?! They are 4.5 inches wide and 2.5″ tall (@6.3cm). I am at as point where there are 3 units in a row with 2 interior shared walls. The back wall is not present as this terrain piece is for the game Mordheim and I wanted to provide “ruined” buildings for players to traverse in/out and thru. Also I am debating whether to clad this ground floor with “stones”. I can use various methods including painting different “stones”, gluing individual stones (i.e. cut/textured foam), remove the paper from the foamboard and draw/carve in the stone pattern. These methods will all be refined in the later painting phase of the project anyways. Maybe I will try all three methods for “shites and jollies”. Let’s see if you can tell at the end of the project.
METADATA-STARTMETADATA-STARTMETADATA-START
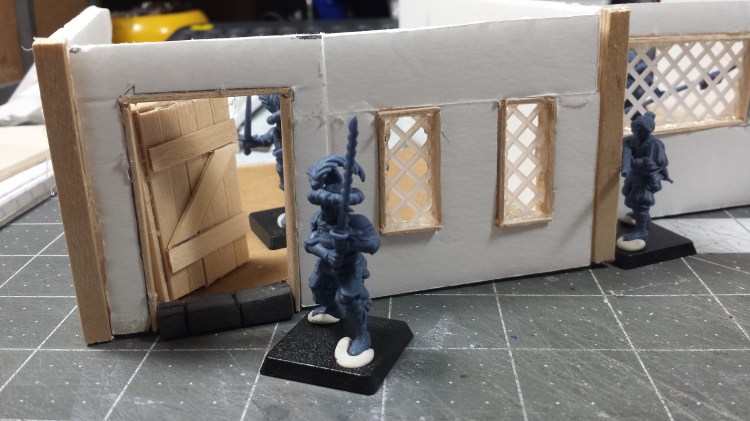
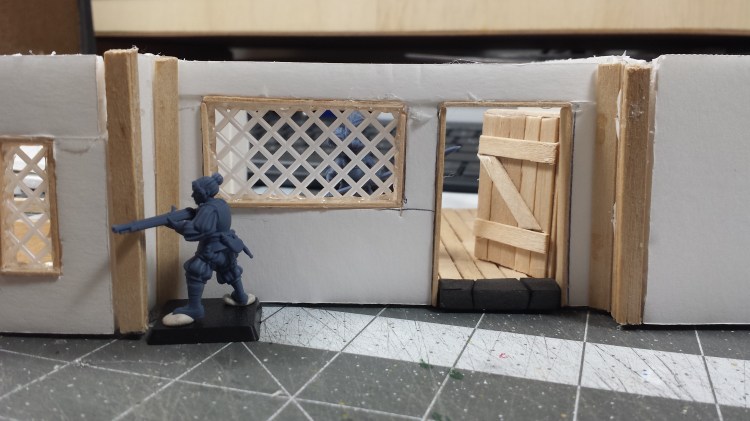
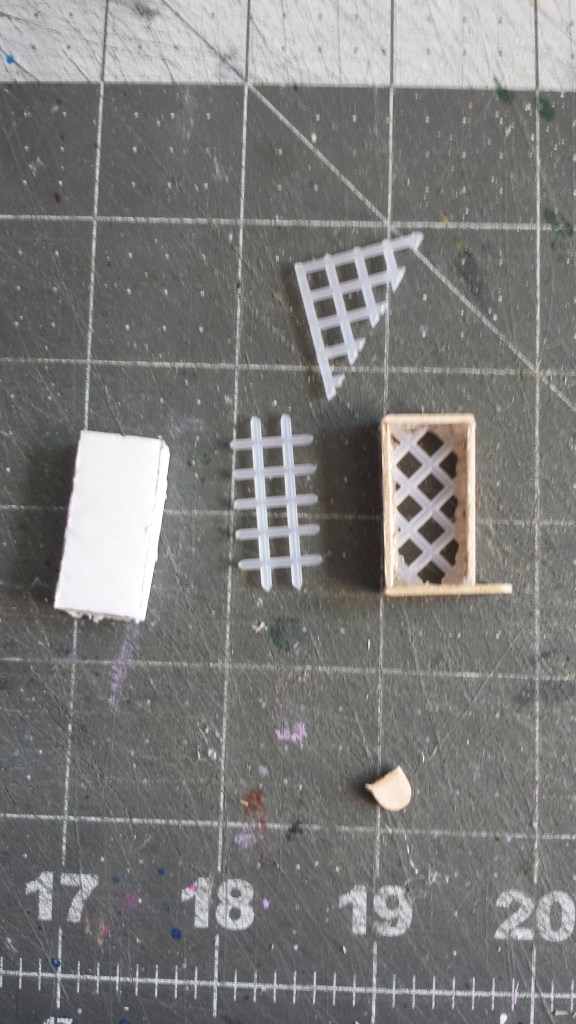
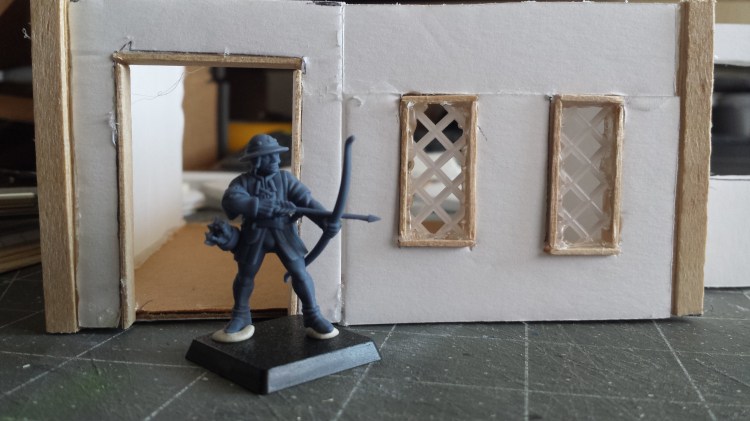
Openings. Although I left the back sides open for now on this ground level, I did want doors and windows for the aesthetics and practicality. These were once fully enclosed houses before being destroyed by the fallout and fragments of the twin-tailed comet’s crash landing into Mordheim. I want to give the denizens at least that. I cut openings for doors and windows. I framed them using coffee stir sticks cut to fit. I used the granny mesh with the stir sticks to create windows. I will figure out how to add “glass” to each at a later time or leave the glass out for now. Don’t know yet.
METADATA-STARTMETADATA-STARTMETADATA-START
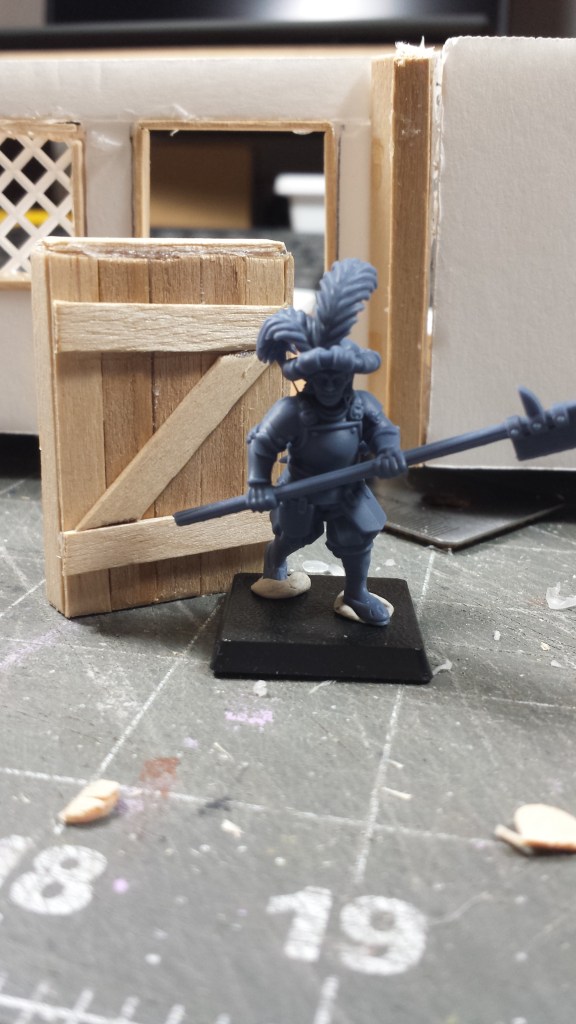
Doors. I wanted the look of wooden doors, so out came the stir sticks again. I used the foamboard as the base. I clad the foamboard in strips of sticks and even included some bracing. These turned out a little beefier than I anticipated. I wanted to make the doors ajar in a later stage of the build to give the illusion that each house was breached and rummaged thru.
METADATA-START
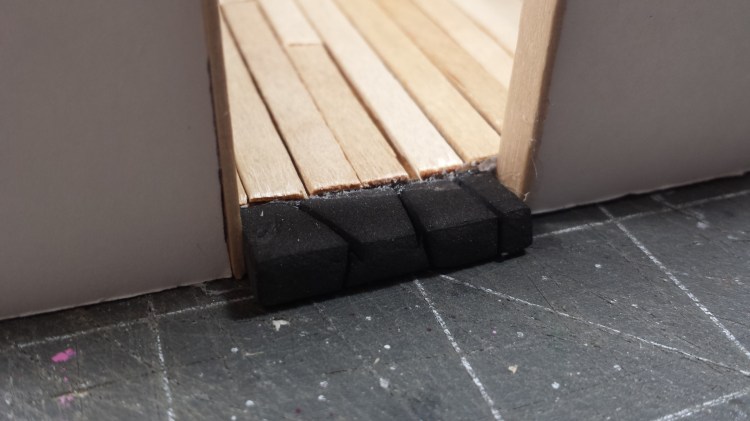
Flooring. I learned through some research that medieval/old world style houses of this nature typically had stone walls with either dirt or stone floors for the ground levels. Typically, homes with wooden floors would suffer from wood rot/decay due to the contact with the moist ground. But I said, “Tis my house m’lord, and I shall cover thine floor with whatever I chooseth”. And I choose wooden (stir sticks) planks for the houses. For now. I created a threshold for each using EVA foam. I cut up small rectangular strips to length. I scored each one and blasted it with a heat gun (you can use a hair dryer also). Doing so will allow the scored lines to seal and open up giving the appearance of individual stones.
METADATA-STARTrsqqsptmqqqqqq
And so. This is where I am at. Gonna work on this project a bit more later today. Hopefully have an update later tonight or soon. Wish me continued progress. It’s all I can ask for. That and click on my affiliate links? Hahahah. It was worth a shot.
As always. Happy crafting!
What hobby/miniatures things are you working on today? Let me know in the comments. Thanks.
Hi. It’s me. Back from where-ever I was hiding off at. I finally decided to pick up a few “28mm/32mm” minis for this Mordheim thing I have been “looking into since who knows when. The main reason was to use minis so that I could scale terrain buildings accordingly.
I ended up getting some 3D printed resin minis sculpted by Vae Victis off a seller on Etsy. They came in fairly quickly considering they had to be printed, cured, cleaned, packed and shipped in less than a week. I am assuming this was fast. This was my first time getting bespoke minis since I don’t currently own a 3D printer (resin or other).
The sculpts look fantastic and even if I don’t use them for tabletop gaming, I could still enjoy them thru the painting and basing process. Compared to “official” GM minis in the same genre, these have less sharper details, however, they are definitely above the dollar store molded flexible plastic minis I have seen.
Here are some of them next to a test building I crafted. I will be placing these on square bases in the end…more to come.
It is truly amazing how much has happened since I last posted, yet so little has been done. Maybe amazing is not the appropriate word for what has been going on. There was a family tragedy, followed by family drama, and more recently, some reconciliation. However, I lost the motivation to move forward.
There is so much motivation around. Things I read and watch on the web. Observations of things I could apply to my hobby or craft from my real life surroundings in my house, yard, neighborhood or distant places I have travelled both in the past as well as recently. But I lost the “want” I had for my hobby. How could I want, when so much need that exists that drains my energy and will. I have (an maybe continue to) lose sleep over thinking about it.
Was it me? What is them? Was is a combination of the two. I travelled a long distance with a companion to identify the situation that caused the rift and try to move forward. I have had some trouble trying to even get to that point, but with encouragement from my spouse and travelling companion, I moved forward and took that journey. What was the result? The beginning of the healing process, but there is a long way to go.
I sleep a little better at night. I am finding my motivation again, even if it not directly related to this endeavor or my hobbies. I am slowly healing, but it is a grand canyon of a wound that may never heal (or even grow). As they say, “only time will tell”.
In the meantime, I am making an effort to work on this little side hustle/hobby/slash that maybe I could make some side income in the future. The community helps with motivation, but ultimately, it must come from within me.
More to follow.
Happy crafting.
BTW – How’s your summer going? What projects are you working on? Just asking for a friend.
Hi – Hope your 2024 hobby and crafting endeavors are going well.
Just wondering, did you have a chance to view (and purchase) a copy (or two or a dozen) of my Journal for Wargamers? I’d like to know what you think. How are you using it in the wilds of your home or local gaming clubs? Are you able to share it with your cohorts or rapscallions? Maybe you bought a couple dozen to share with your warband IRL?
Post your comments here or on my other socials (Instagram or Youtube). Hello, hello, hello (fades). Echo, echo, echo (fades). Thank you, you, you (fades)
If anything, you are supporting the efforts of this website and accompanying socials. I really, really much appreciate it.








 A Little Bit of Glue
You must be logged in to post a comment.